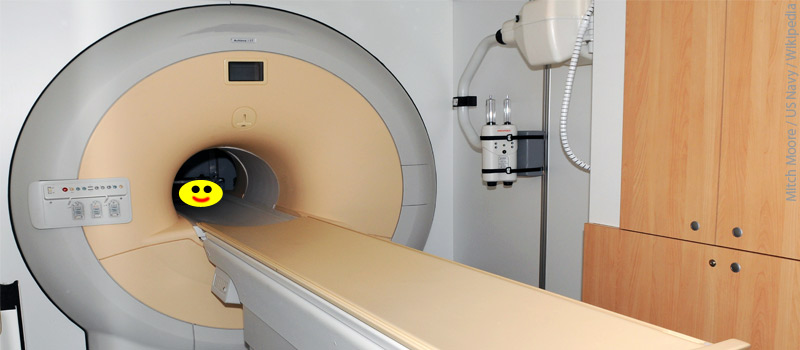
We will discuss the following aspects. Please scroll down and start reading.
- It is all about water : the hydrogen nuclei
- Strange world of quantum physics and spin
- Detection of hydrogen nuclei
- How the MRI machine is able to target different areas of the body
- Receiver coils
- Magnet and Quenching
- Noise : The ” Gradient Coil Guitar “
- Anesthesia and MRI

Do you work in the field of anaesthesia? If so, are you a “wise” person?! Find out at the free anaesthesia website at the link below. In it, there is a lot of serious and non-serious stuff for those working in anaesthetics. You will also understand what the new anaesthesia concept called “BE WISE” is all about.

Magnetic Resonance Imaging (MRI) is a wonderful tool that lets you see inside the body with amazing clarity. The best part is that it does this with no harmful radiation. Unfortunately, the physics concepts related to MRI are complex and mysterious and I do not have enough brain power to fully understand it. Nevertheless, hopefully my explanations will give you a good starting point to understand this exciting technology.

However, if you are an imaging professional, I am sorry to say that my explanations will be too basic for you, and I would advise you to read much more detailed material elsewhere (Good Luck !).
It is all about water (the hydrogen nuclei) !
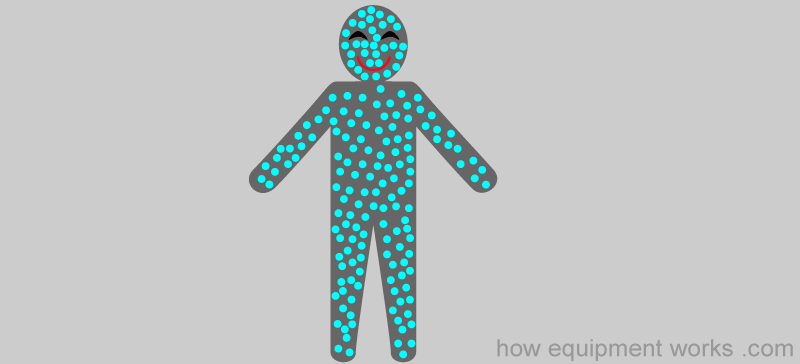
The MRI machine is able to “see “water and this makes it a very useful tool as we humans are mostly made out of water (about 70 %). Water is distributed throughout our body in different ways and the MRI machine is able to see these differences and construct an image for us.
As you probably know, water consists of water molecules. A water molecule is made up of two hydrogen atoms and one oxygen atom.
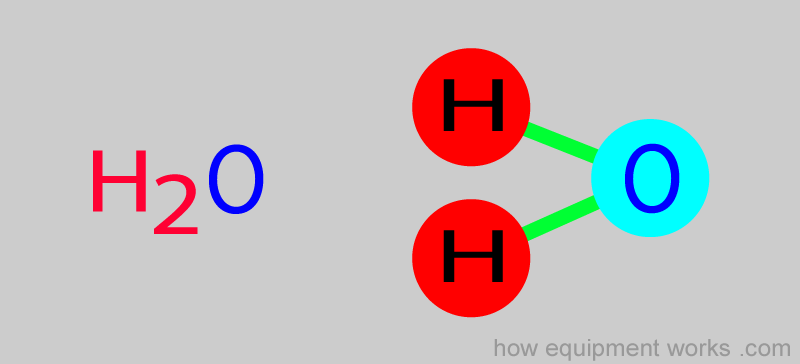
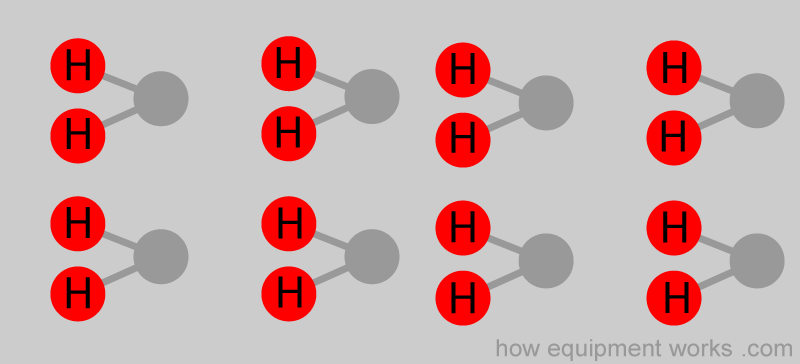
The MRI machine does not “see “all parts of the water molecules. Instead, it sees only specific parts of each water molecule. Let me explain. The diagram below shows some water molecules.
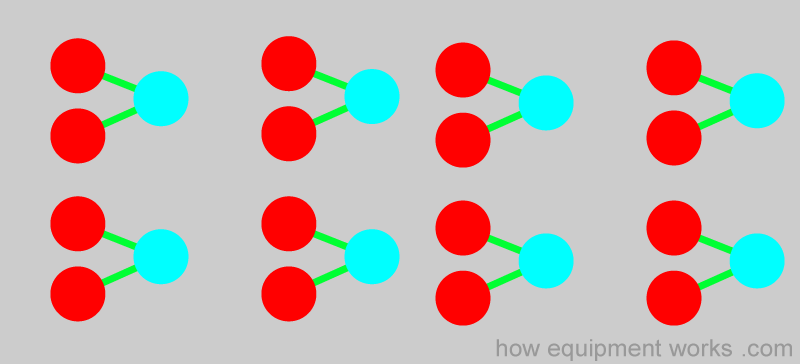
The MRI machine can not see oxygen atoms of the water molecules, so let us ignore them. What you have left are the hydrogen atoms shown in red below.
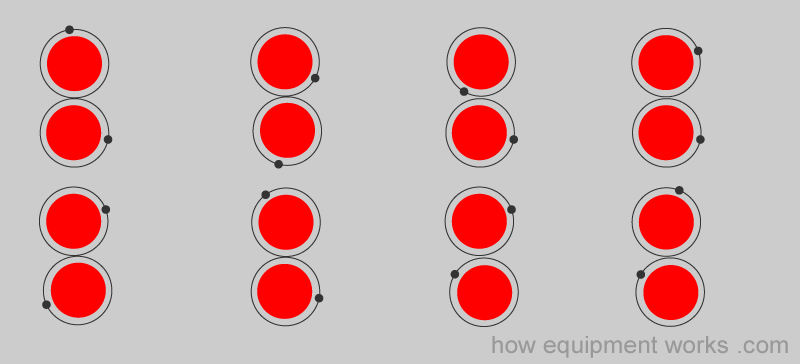
Each hydrogen atom consists of a nucleus with one electron going around it. The MRI machine doesn’t “see” these electrons either.
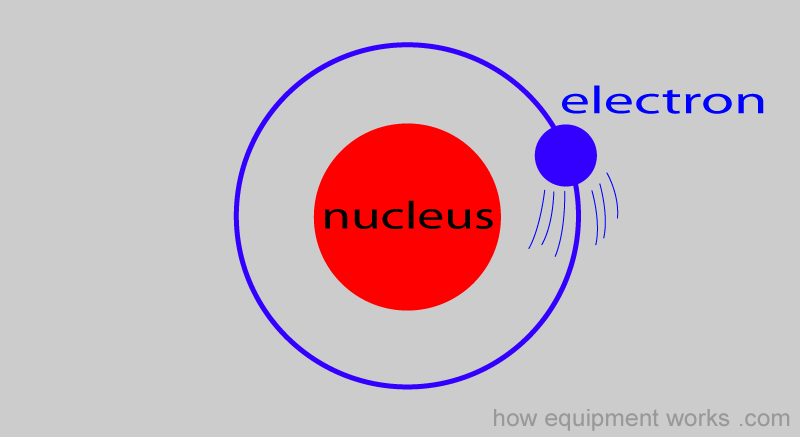
All it sees is the hydrogen nucleus.
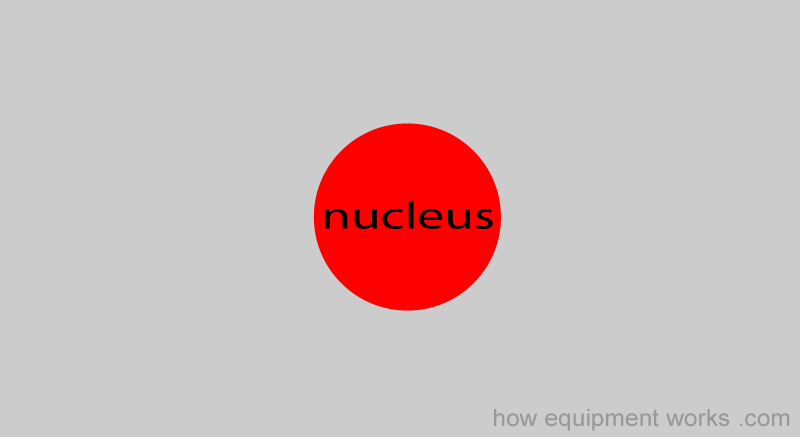
To summarise, regarding water molecules, the MRI machine does not see the oxygen atoms or the electrons of the hydrogen atoms.
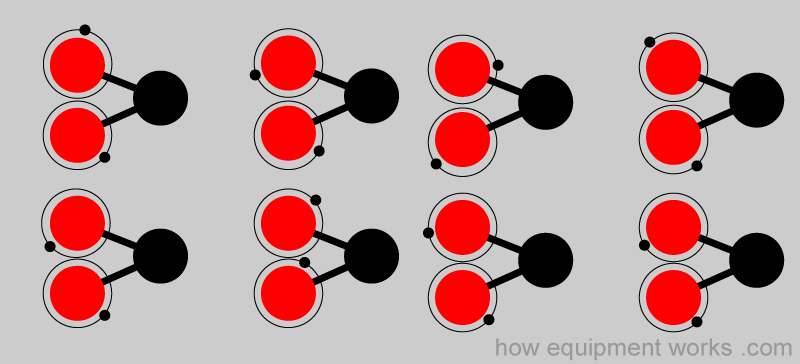
It only sees the hydrogen nuclei contained in water molecules (Note: plural of nucleus is “nuclei “).
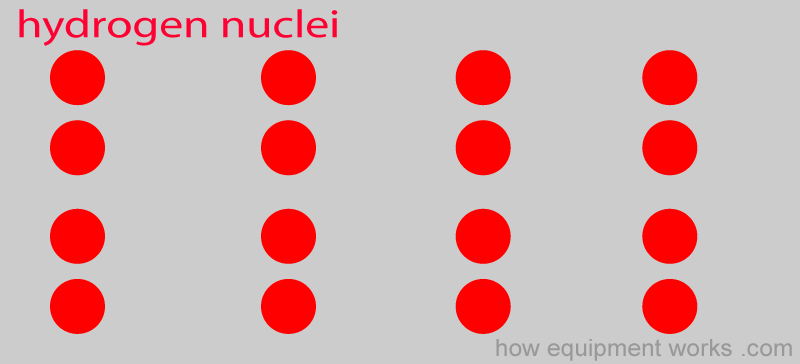
The MRI machine uses certain properties of these hydrogen nuclei to compose an image for you to see. The concepts it uses to do this can be a little complex, but if we approach it in a step by step manner, we will eventually understand the basics.
Strange world of quantum physics and spin
At this point, I need to warn you that you will soon be introduced to some very strange physics phenomena.

Physics can be divided into two categories called ‘classical physics’ and ‘quantum physics’. Classical physics deals with ordinary everyday objects that you and me can see. For an example, classical physics can easily explain how a ball bounces on a floor.
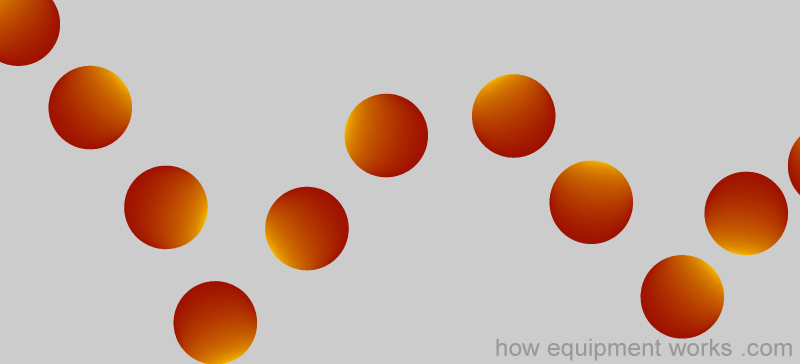
On the other hand, the branch of physics called “quantum physics” deals with much smaller things. When I say small, I mean things that are extremely small such as atoms and electrons. At this level, the rules of classical physics that we are used to, seem to “break down”. Instead, extremely small particles such as atoms obey the very weird rules of quantum physics. For an example, in the world of quantum physics, an electron can be at “two places” at the same time ! An electron can be sipping some coffee in New York, in the USA, and at the very same time, can be sipping tea in New Delhi, India. Okay, the tea and coffee part is not true, but the being at two places simultaneously is true. (If you do not believe me, search for “double slit experiment ” on the internet to find out more) .
What I am trying to say is that quantum physics is weird and I recommend, for your sanity, that you don’t try to understand it too deeply. Unfortunately, MRI machines deal with very tiny particles (i.e. hydrogen nuclei) and therefore they follow the rules of quantum physics. It is difficult to ‘imagine’ quantum physics, because often there is nothing in our everyday life that behaves like it.
Now let us return to discussing the MRI machine. You will recall that we said that MRI machines can “see” hydrogen nuclei contained in water molecules.
Hydrogen nuclei have a quantum physics property called “spin “. Now you probably imagine hydrogen nuclei “spin” to look something like this.

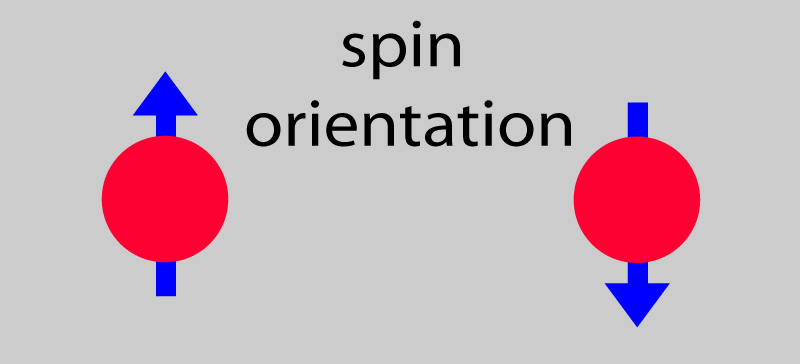
Unfortunately, as mentioned before, in quantum physics things are weird. In quantum physics terms, “spin” doesn’t mean going round and round. Instead, it is a much more complex property that is difficult to describe. So, like many things in quantum physics, it is best to accept certain things, instead of getting grey hairs trying to understand it. So accept that, according to the laws of quantum physics, hydrogen nuclei have a property called spin, which can be ‘oriented’ in certain ways.
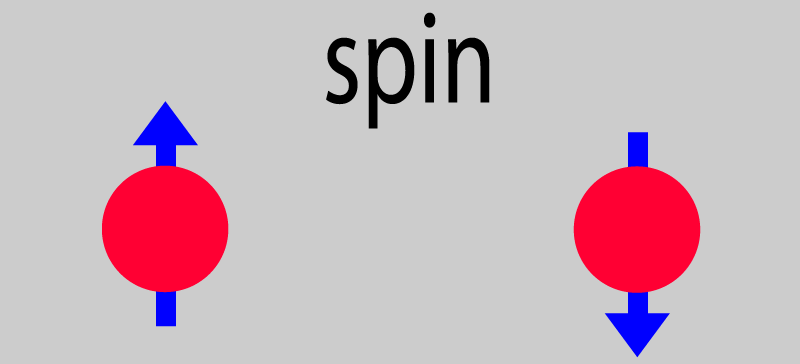
You may wonder why scientists use a word like ‘spin’ to describe something that doesn’t actually spin. The answer to that I do not know. However, I can tell you that quantum scientists like to use strange names to describe things. For an example , there are particles in nature called ‘Quarks’ . There are six known types of Quarks, and here are their official names ( I am not joking):

So you see, having a strange name like ‘spin’ to describe a property of hydrogen nuclei is not unique. For a moment, let us put this spin story away. ( Don’t worry, we will come back to it later).
Detection of hydrogen nuclei
We are now ready to start understanding how the MRI machine works. The MRI machine cannot just simply “see the hydrogen nuclei which lie “hidden” in the water molecules distributed in the patient.

It needs to do ‘something’ to the hydrogen nuclei to detect their presence. It is a bit like the scenario I will describe to you. Just imagine that we have three grumpy men.

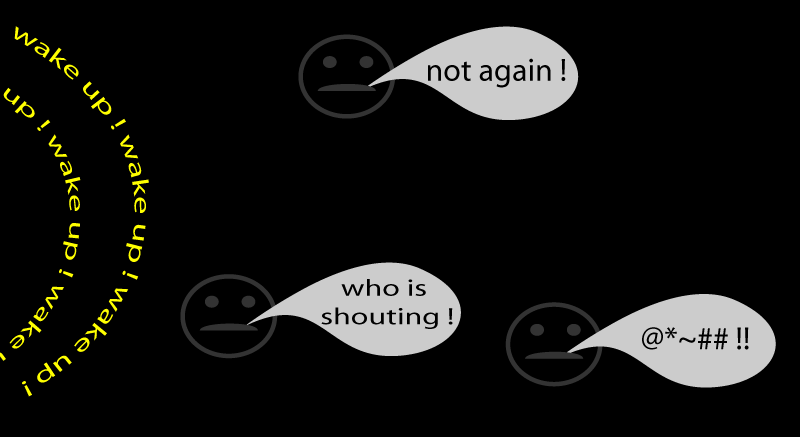
The three grumpy men are now sleeping in this black room. Let us imagine that you have work out where each of the three men are. But looking at the room, you really can’t make out where they are since it is completely dark.

One way to work out where the three men are is to “irritate them “. You send some “energy “ across the room in the form of you shouting “wake up “ repeatedly.

This will agitate the men and they will shout back at you. By working out from where their voices are coming, you can identify where the three men are.
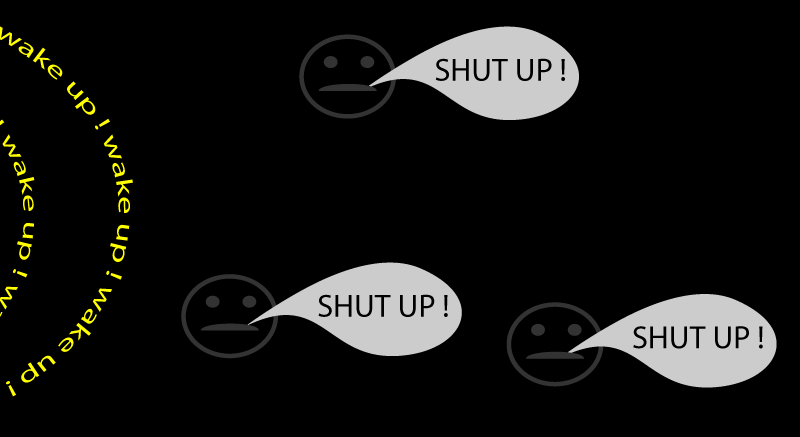
The MRI machine does something similar to detect the hydrogen nuclei. It first “irritates “ the hydrogen nuclei and then from their “responses”, detects their presence. How the MRI machine does this is somewhat more complicated than shouting to detect three grumpy men, but don’t worry, I will explain it to you.
Magnetic resonance imaging, as the name implies, makes use of a magnet. So let us start by giving our MRI machine a strong magnet. In the highly simplified diagram of a MRI machine drawn below, the magnet is shown as the green coils of wire. The magnetic fields produced by the magnet is represented by the green lines with arrows. This magnetic field is continuously present and in our example, goes from the top to the bottom (direction of arrows).
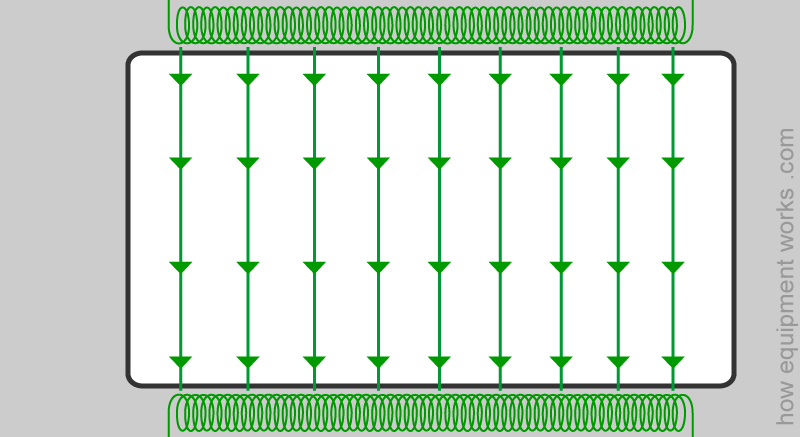
We now put the patient into the magnetic field of the MRI machine.
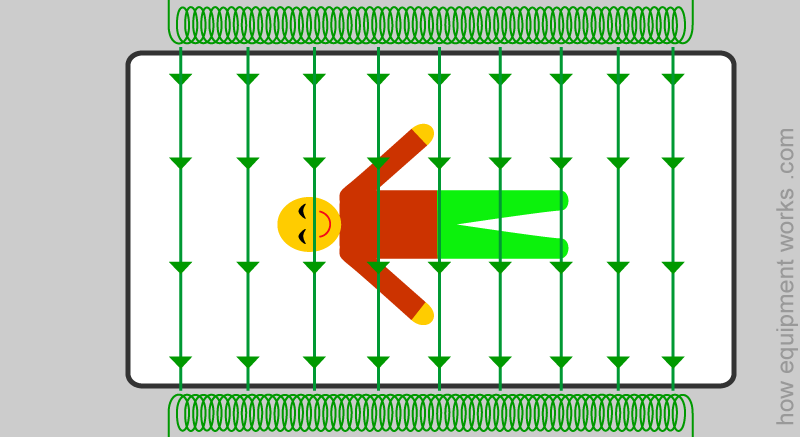
The patient, like all of us, has water molecules distributed all over. As described before, the water molecules have hydrogen nuclei, and this is what is of interest to the MRI machine.
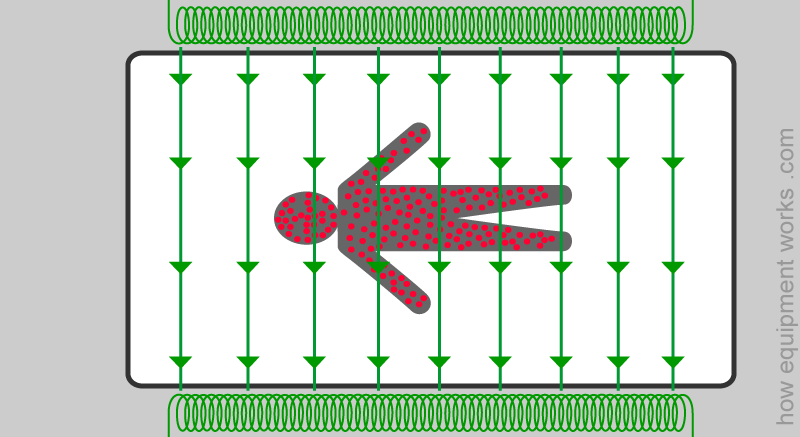
To make the diagrams clearer, I will no longer draw the patient. Instead, I will only show the hydrogen nuclei that are inside him.
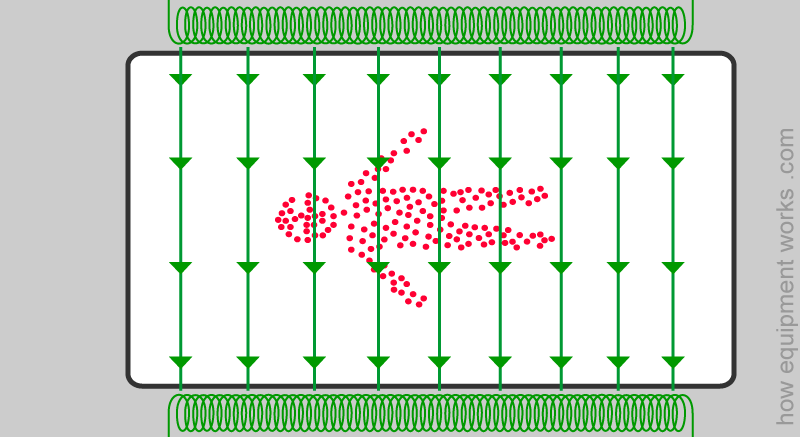
To further make the diagrams clearer, I will be showing a close up of only a few of the hydrogen nuclei.
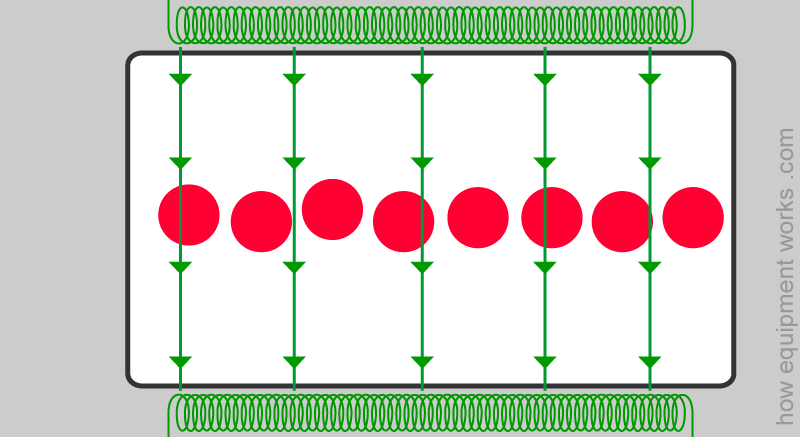
You will recall that due to the weird laws of quantum mechanics that hydrogen nuclei have a property called ‘spin’. The spin can be ‘oriented’ in certain ways.
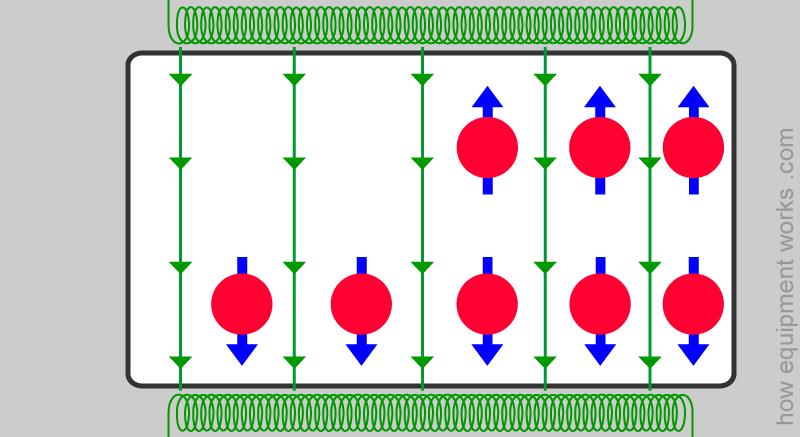
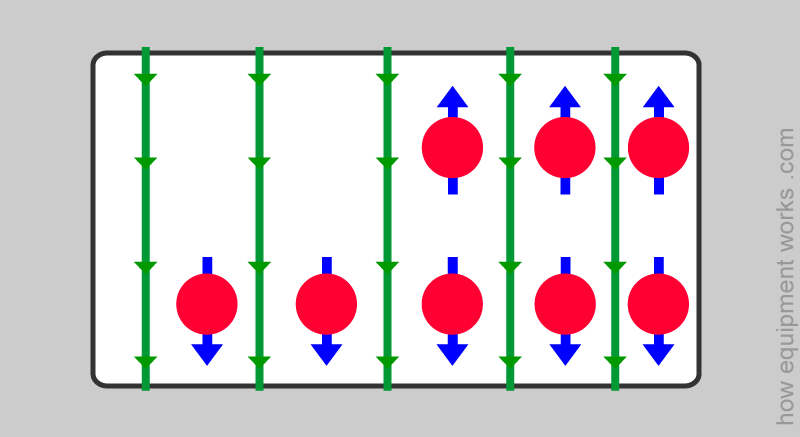
The magnetic field does something interesting to the spins of the hydrogen nuclei. In our example shown below, the magnetic field (green lines) are going from the top to the bottom. The strong magnetic field makes the spins (blue arrows) of the hydrogen nuclei line up along the magnetic field. Some of the hydrogen nuclei line up in the direction of the magnetic field (lower nuclei in diagram) and other hydrogen nuclei line up opposite to the direction of the magnetic field (upper nuclei in diagram).
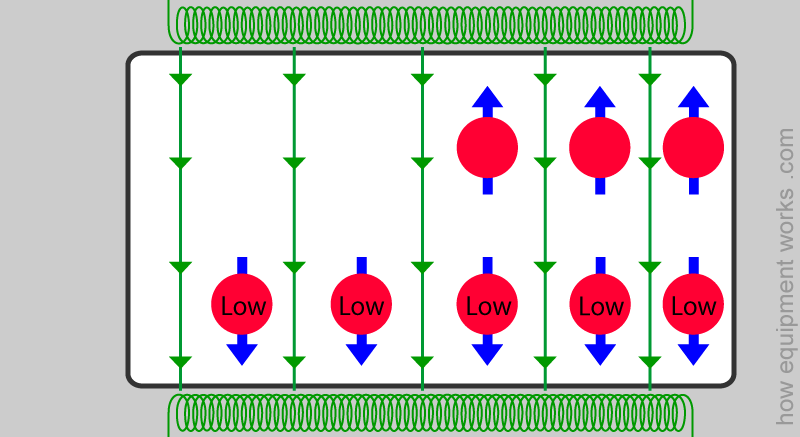
As mentioned before, the spins of some hydrogen nuclei are in the same direction as the magnetic field. Since these nuclei choose to be in the same direction as the magnetic field, they do not need much energy (you can think of them to be the “lazy” ones). In our diagrams, as shown below, I will label these “low energy nuclei” as “Low” .
There are also some hydrogen nuclei that have spins that are in the opposite direction to the magnetic field. Unlike the lazy nuclei you saw before, these ones have to “fight” the magnetic field and therefore have an “higher” energy. In our diagrams, as shown below, I will label these “high energy nuclei” as “High” .
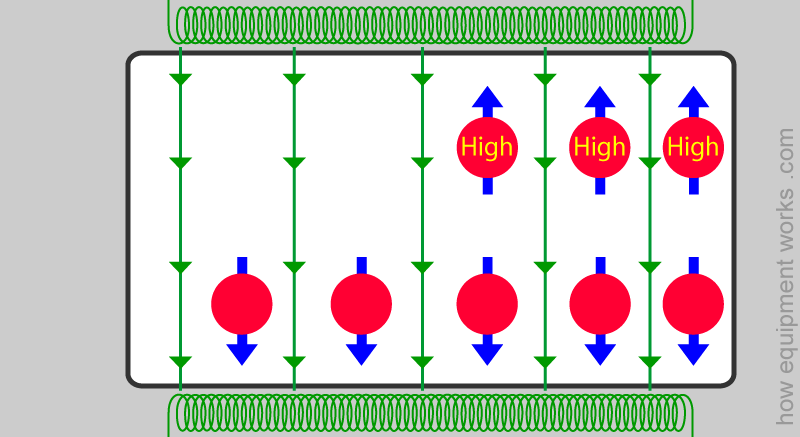
After the magnetic field has made the nuclear spins line up, you will notice that there are slightly more low energy nuclei than high energy nuclei . I suppose hydrogen nuclei are like humans: there are more lazy ones than active ones !
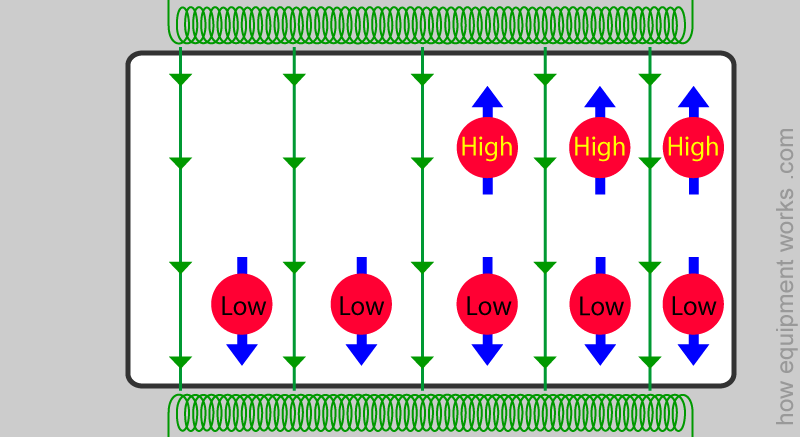
This slight excess of low energy hydrogen nuclei is extremely important. As you will see soon, it is the behavior of these low energy hydrogen nuclei that make MRI possible.
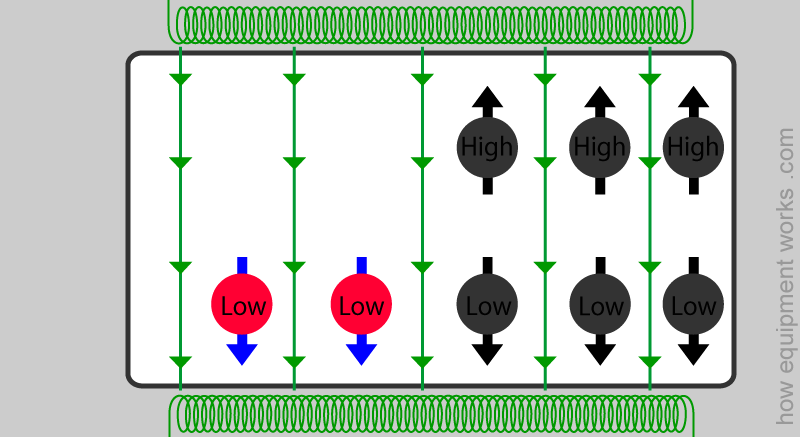
Do you remember our story about finding the three grumpy men by irritating them ?
As mentioned, the MRI machine does something similar. However, instead of ‘shouting’ things, it uses ‘energy’ to ‘irritate’ the low energy hydrogen nuclei. Let us see how the MRI machine does this.
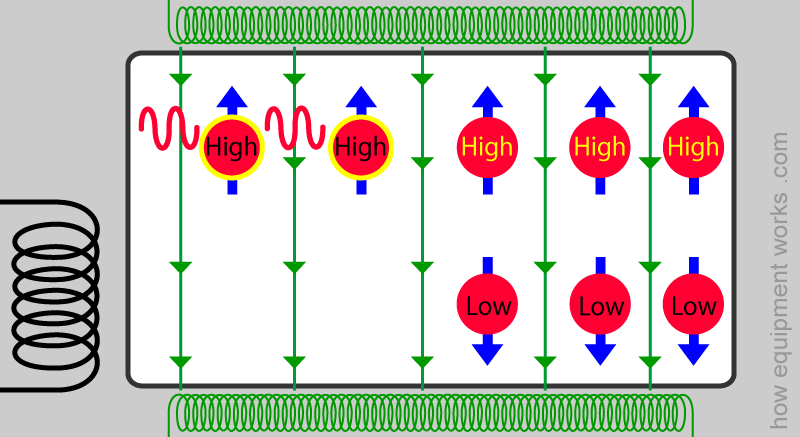
The MRI machine has a special coil of wire that is there for the purposes of producing the needed energy to ‘irritate’ the low energy hydrogen nuclei. In the diagram below, this coil is shown in black, on the left side.
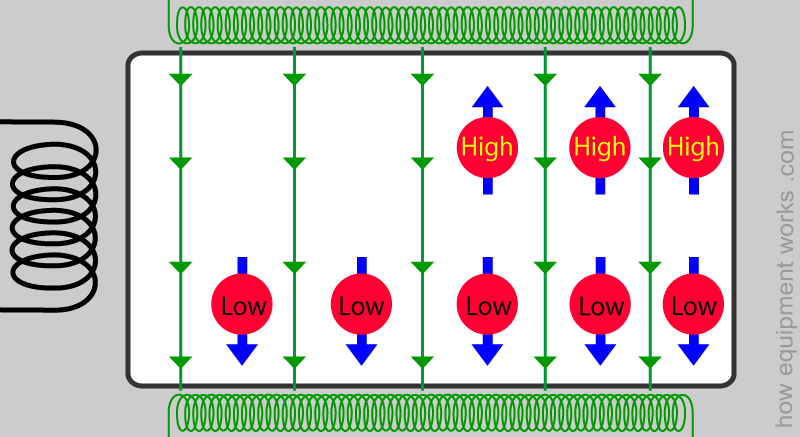
The MRI machine applies a current to this energy producing coil for a short period. During this period, the coil produces energy in the form of a rapidly changing magnetic field (pink waves in diagram below). The frequency (i.e. how often it changes in one second) of this changing field falls within the frequency range commonly used in radio broadcasts. Therefore this energy is often called “radio frequency” energy (RF energy) and the coil is often called an radio frequency coil ( RF coil).
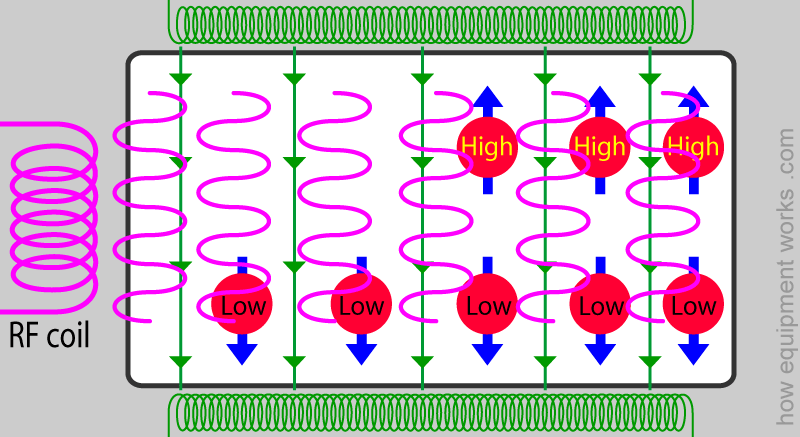
Now something fascinating happens to the hydrogen nuclei with low energy. These hydrogen nuclei with low energy absorb the energy sent from the RF coil.
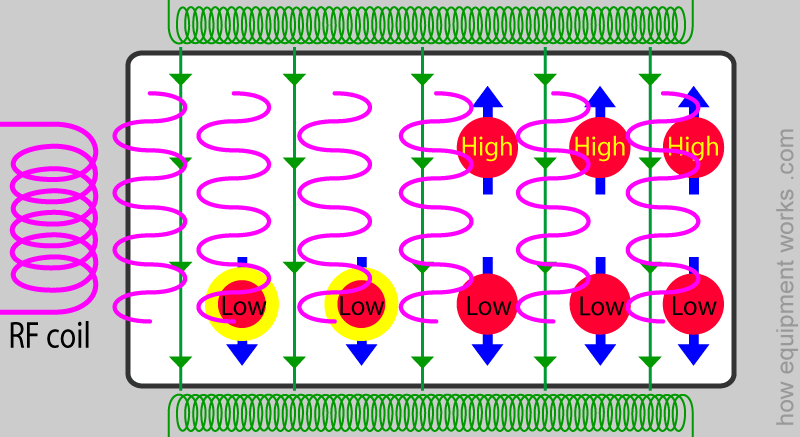
The absorption of RF energy changes the energy state of the low energy hydrogen nuclei. Once the low energy nuclei absorb the energy, they change their spin direction and become high energy nuclei.
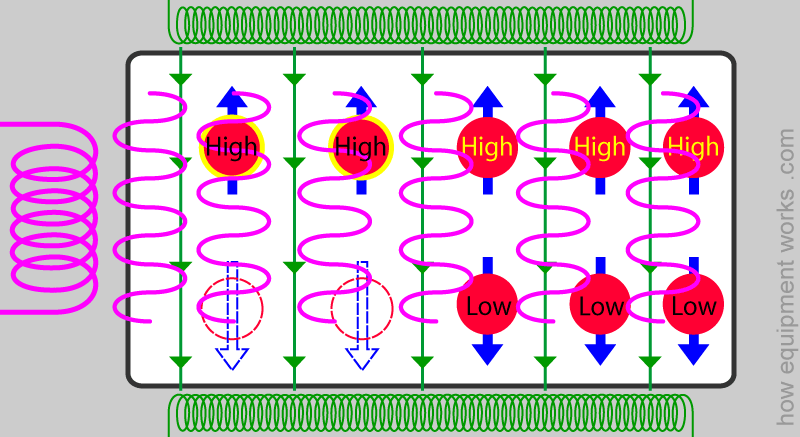
After a short period, the RF energy is stopped.
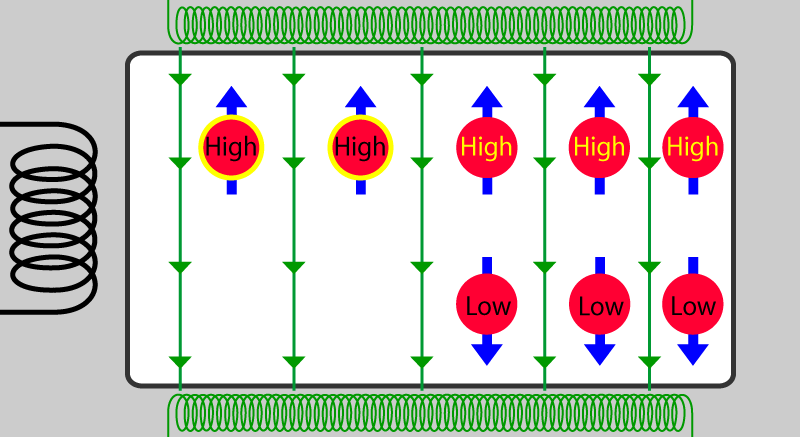
The hydrogen nuclei that recently became ‘high energy’ prefer to go back to their previous, ‘low energy’ state and they start releasing the energy that was given to them (i.e. the previously lazy nuclei want to be lazy again !). They release the energy in the form of waves, which in the diagram below, is shown in red.
The MRI machine has “receiver coils ” (blue coil shown below) that receive the energy waves sent out by the nuclei. Having given up their energy, the nuclei change their spin direction and return to the low energy state that they were in before.
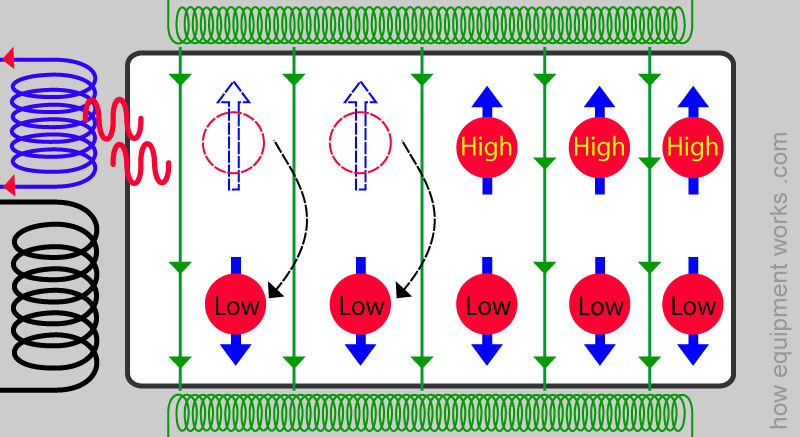
The receiver coil converts the energy waves into an electrical current signal. In this way, the MRI machine is able to detect hydrogen nuclei in the body.
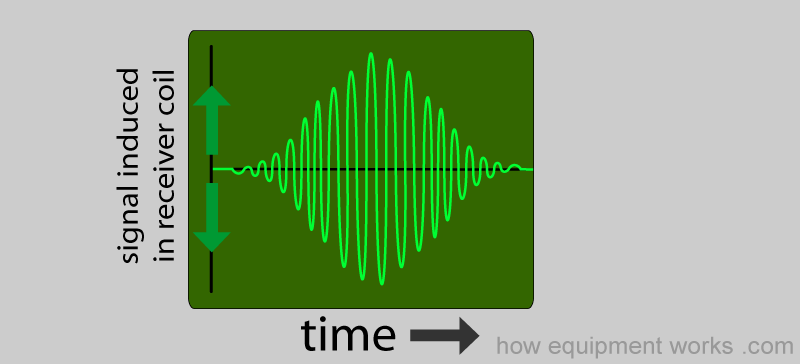
Below is a basic animation that summarizes the sequence the MRI machine uses to give energy and then receive signals from hydrogen nuclei in water molecules. (My animation skills are nearly zero, so please forgive the rather jerky images).

How the MRI machine is able to target different areas of the body
You will recall that the human body is full of water and that therefore there are hydrogen nuclei everywhere. The MRI machine however needs to scan the body in an organised manner. It cannot simply scan the whole body instantly, as the signals returning from all parts of the body at the same time would result in a messy mixed up signal.
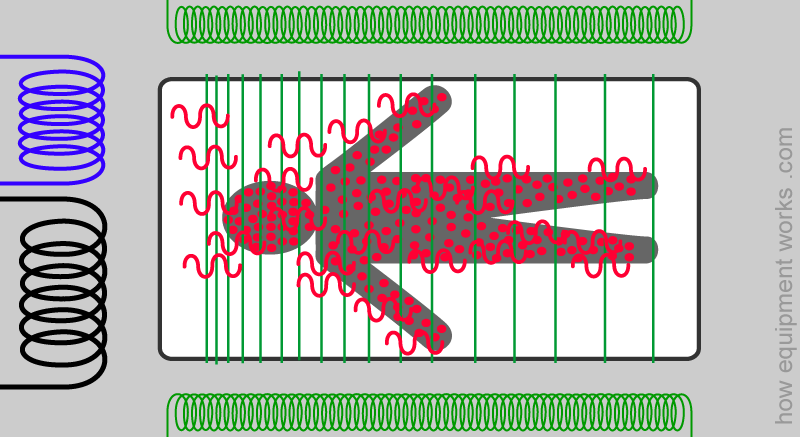
Instead, the MRI machine needs to scan the body in sections. It needs to record signals from hydrogen nuclei in one area before moving onto the next. For an example, let us imagine, for the purpose of discussion, that we are doing a scan of the head. Imagine that it is currently interested in scanning the section of the head shown by the blue arrow. It needs a way to make the hydrogen nuclei of interest (blue ones in image) to respond by taking and returning energy. At the same time, it needs the other hydrogen nuclei not to respond (i.e. all the red dots).
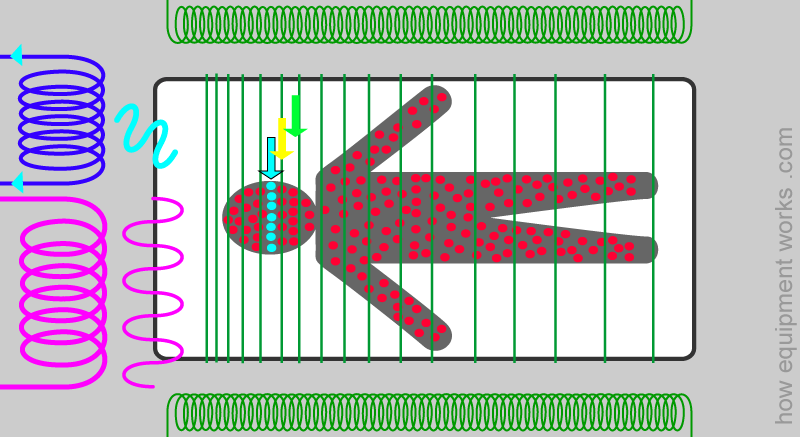
After it has dealt with the section shown by the blue arrow, it now needs the hydrogen nuclei located in the next section (yellow arrow) to respond by taking and returning energy. Again it doesn’t want hydrogen nuclei in other areas to respond (blue and red dots).
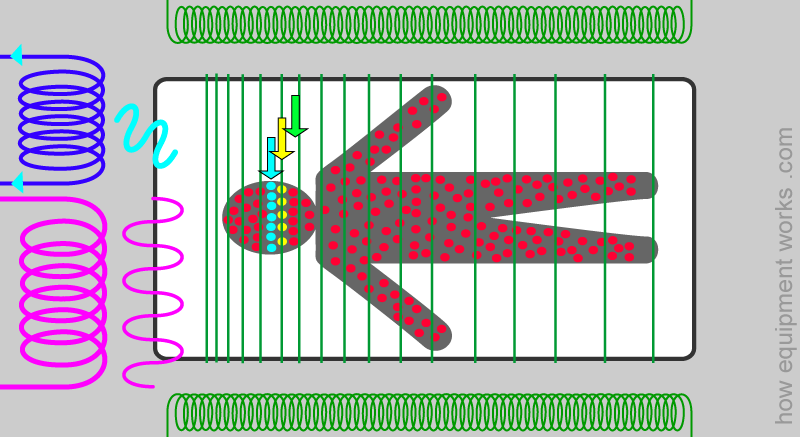
The MRI machine then looks at the section shown by the green arrow and the process goes on. Combining information from these different sections enables it to eventually construct an image for you to see. Now the question is, how does the MRI machine make only hydrogen nuclei in the area of interest respond while keeping all the other hydrogen nuclei quiet ?
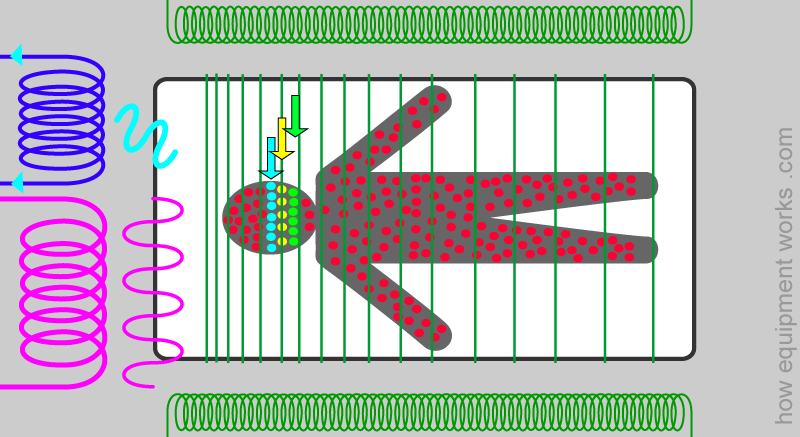
To understand how the MRI machine selects one region at a time, we need to first understand the concept of ‘resonant frequency’.
Resonant frequency:
We saw how the RF coil emits energy which can be absorbed by some of the low energy nuclei.
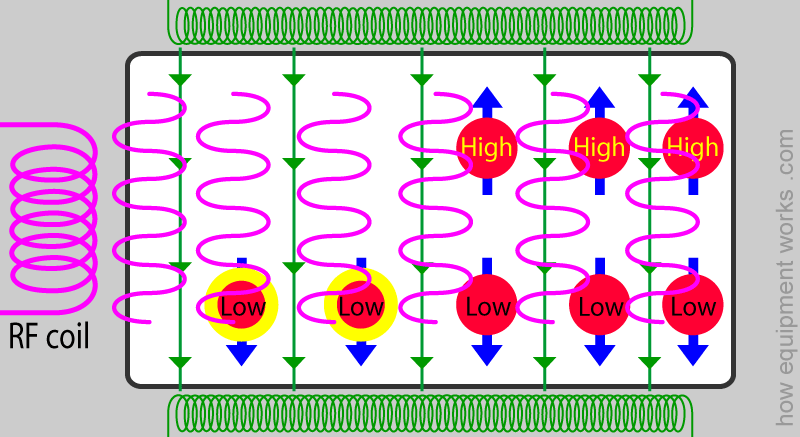
However, quantum physics complicates things slightly. According to its rules, the hydrogen nuclei don’t absorb just ‘any’ energy. They can be quite fussy about ‘what’ energy they accept.
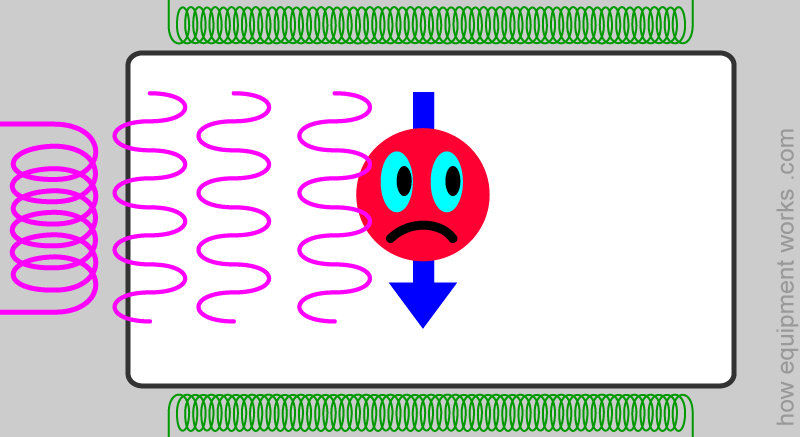
The hydrogen nuclei best absorb energy given in a very specific frequency called the ‘resonant frequency’. Energy given in frequencies that are below or above the resonant frequency are not absorbed by the nuclei.
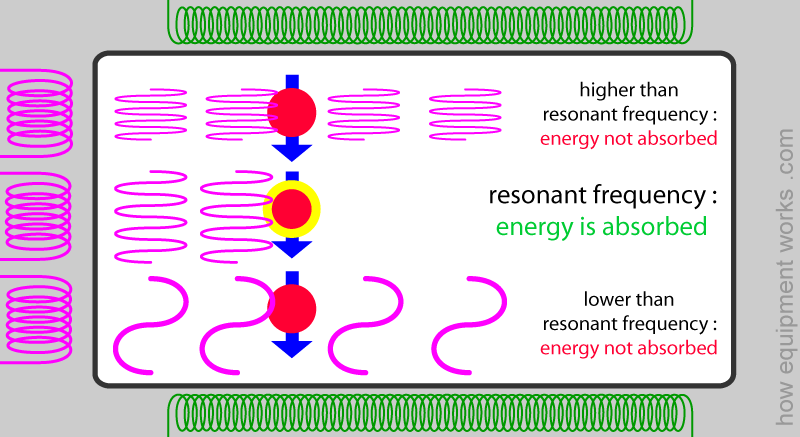
Therefore when the MRI sends the radio frequency (RF) energy wave, it does this at the resonant frequency of the hydrogen nuclei.
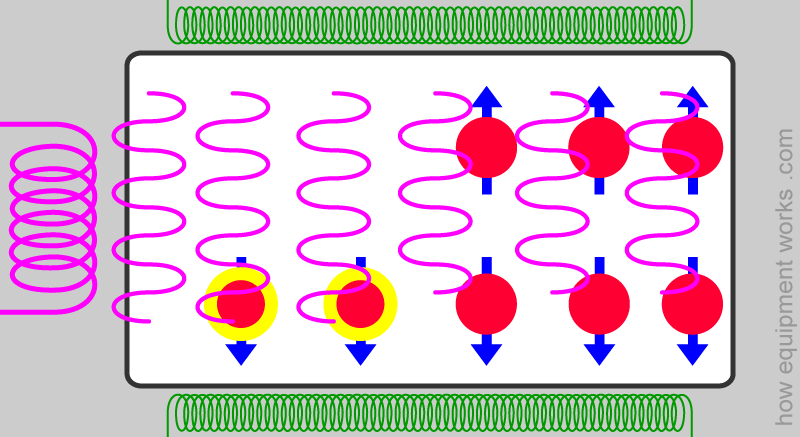
This is why it is called magnetic “resonance” imaging.
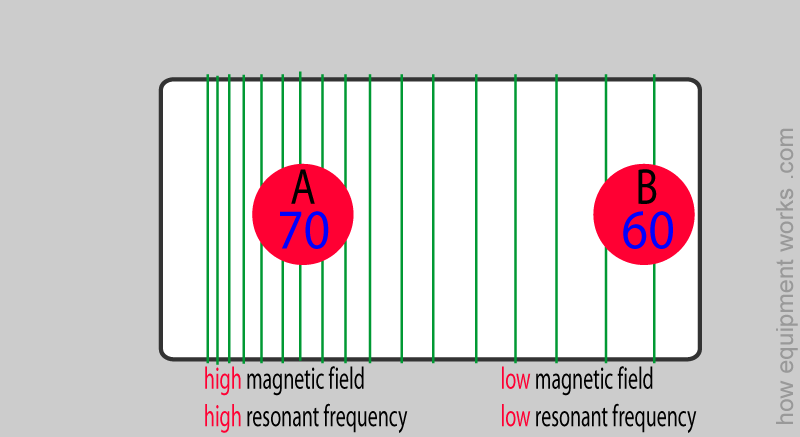
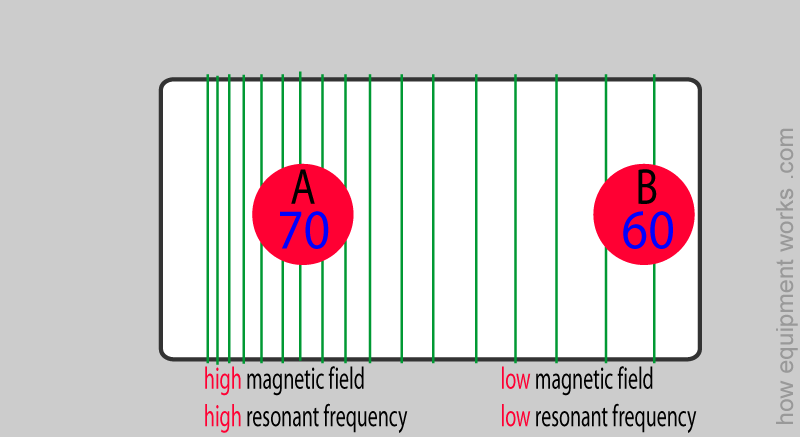
The resonant frequency of an hydrogen nucleus depends on the strength of the magnetic field in the area that it is located in. Higher the strength of the magnetic field, higher is the resonant frequency. Let me explain. Below are two hydrogen nuclei. The hydrogen nucleus ‘A’ is in a stronger magnetic field (represented below with more magnetic field lines) while nucleus ‘B’ is in a weaker magnetic field.
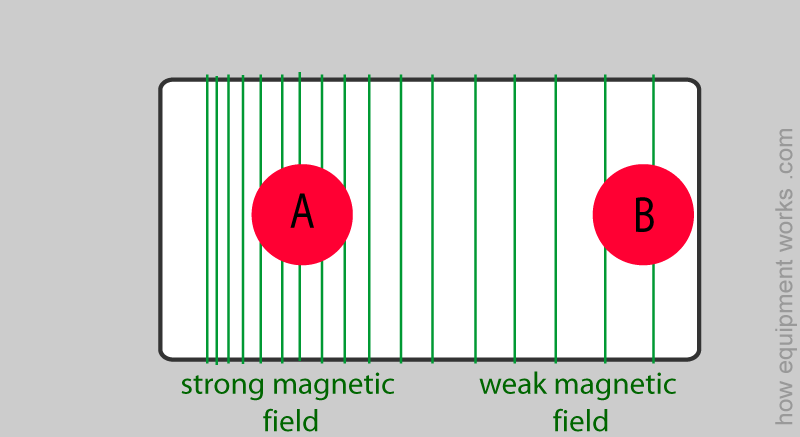
The hydrogen nucleus ‘A’ is in a stronger magnetic field and therefore has an higher resonant frequency. Just as an example, let us say nucleus ‘A’ has a resonant frequency of 70 MHz (MHz = mega hertz = millions of cycles per second). I have chosen this number just as an example. The actual values found in MRI scanners will be different.
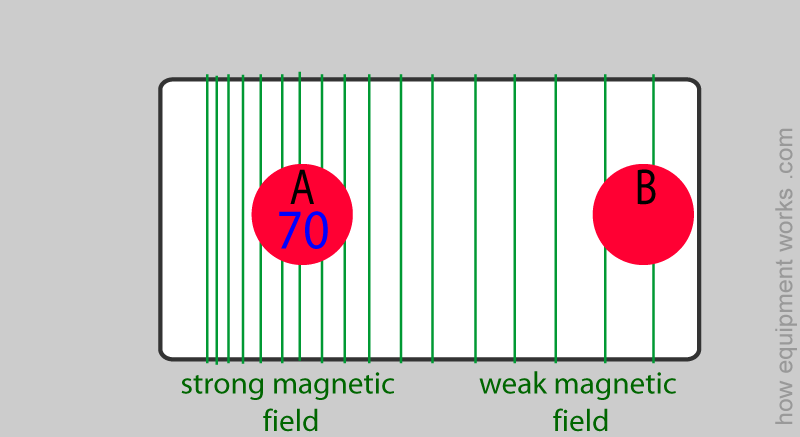
Hydrogen nucleus ‘B’ is in a weaker magnetic field. Therefore its resonant frequency is lower. For explanation purposes, let us say that it is 60 MHz.
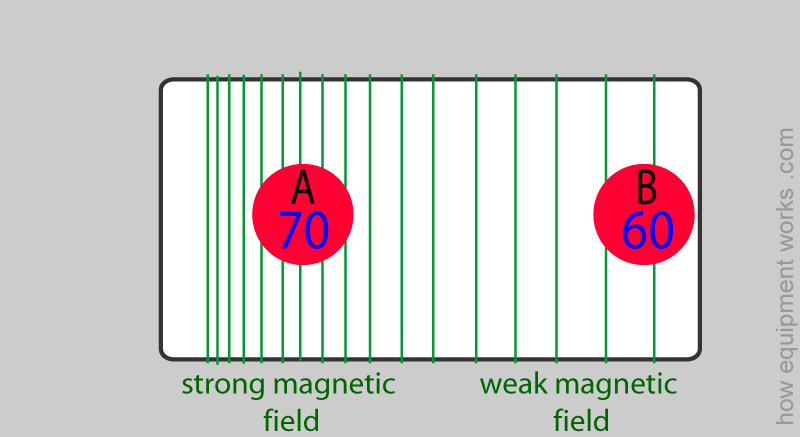
As will be explained to you shortly, this relationship between the magnetic field strength and resonant frequency enables the MRI machine to scan a section of the body at a time.
As mentioned before, there is a strong main magnetic field in the MRI machine. This main magnetic field is uniform throughout. i.e. the strength of the magnetic field is equally strong everywhere.
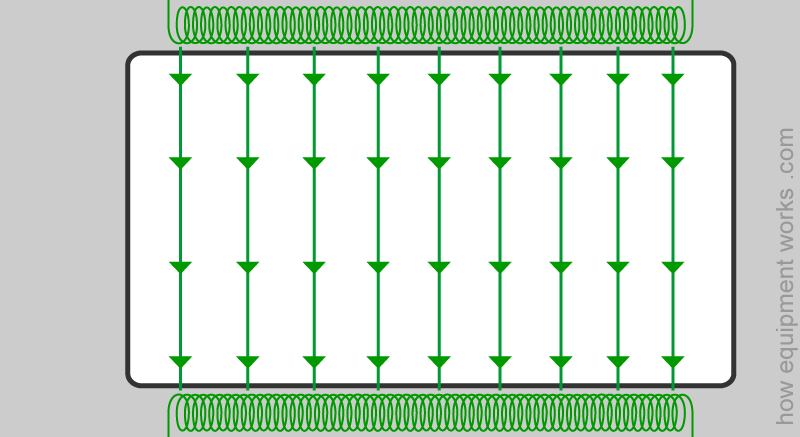
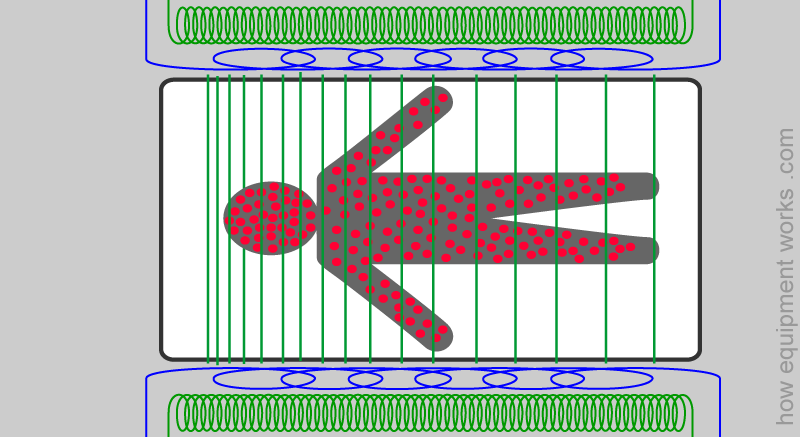
There are special coils shown in blue in the diagram below that alter the main magnetic field. These coils, ‘modify’ the magnetic field produced by the main magnetic coil (green coil) so as to make one end of the patient have a stronger magnetic field and the other end have a weaker magnetic field.
In the example shown below, as we go from the patients head towards his feet, the main magnetic field becomes weaker. We would now say that there is a ‘magnetic gradient” along the patient. The coils that modify the main magnetic field are called “gradient coils”. How these magnetic field gradients are created is fascinating but I will explain that later.
Now you will recall that the resonant frequency of an hydrogen nucleus depends on the strength of the magnetic field in the area that it is located in.
As you have seen before, the gradient coils make the main magnetic field have a gradient : stronger at one end and weaker at the other end. This means that, from the head of the patient to the foot of the patient, the hydrogen nuclei are exposed to different strengths of the magnetic field. At the head of the patient, for an example, the hydrogen nuclei (blue) are exposed to an high magnetic field, and therefore have an high resonant frequency. On the other hand, at the foot of the patient, the hydrogen nuclei (green) are exposed to a low magnetic field and therefore have a lower resonant frequency.
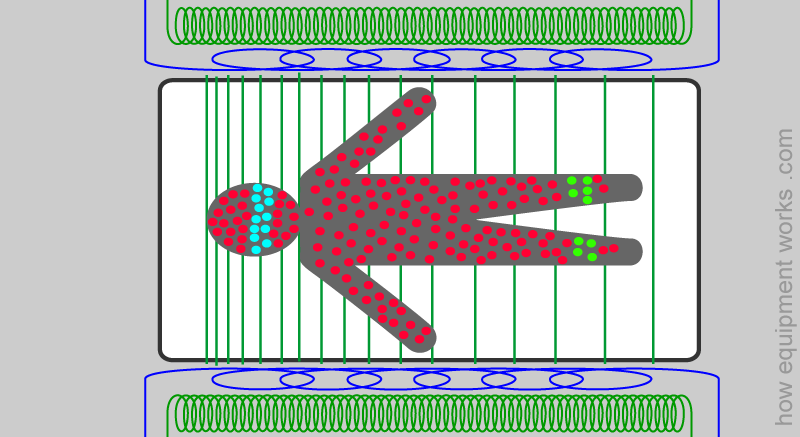
Let us magnify, for clarity, one hydrogen nucleus from the head end (A) and one from the foot end (B). As explained, nucleus A is in a stronger magnetic field and therefore has an high resonant frequency (e.g. 70 MHz). Nucleus B is in a weaker field and therefore has a lower resonant frequency (e.g. 60 MHz).
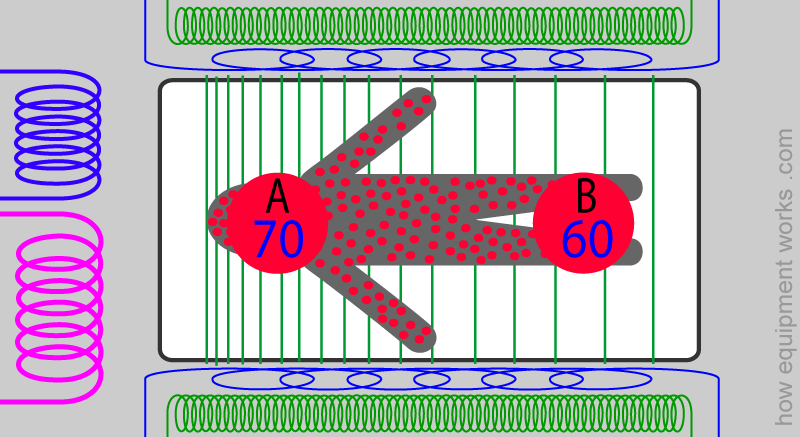
Let us get rid of the patient diagram to make things less cluttered.
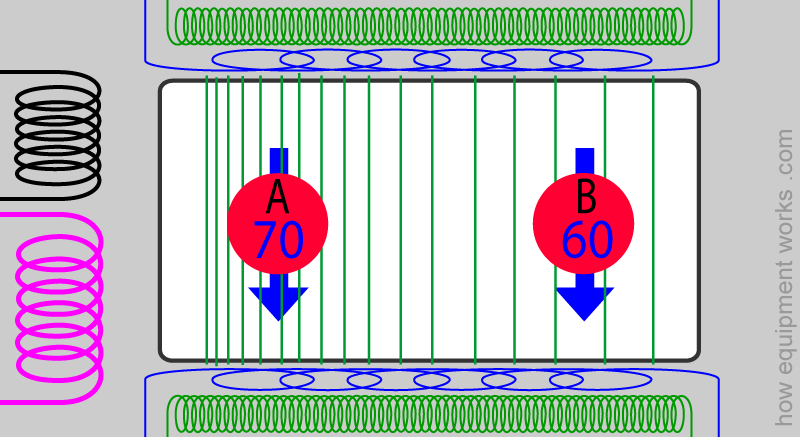
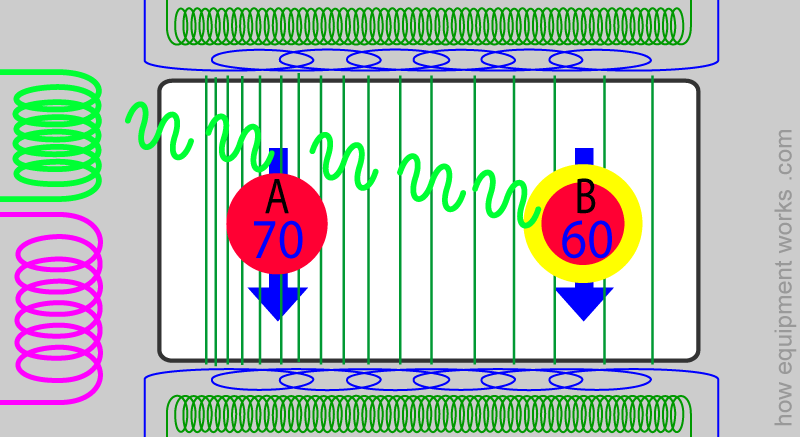
Now you are ready to understand how the MRI machine selects various areas to study. Let us imagine that it wants to image the foot area (i.e. it needs the foot area hydrogen nuclei (B) to respond). It does this by sending RF energy (from the pink RF coil) at the resonant frequency of the nuclei of interest, in this case 60 MHz.
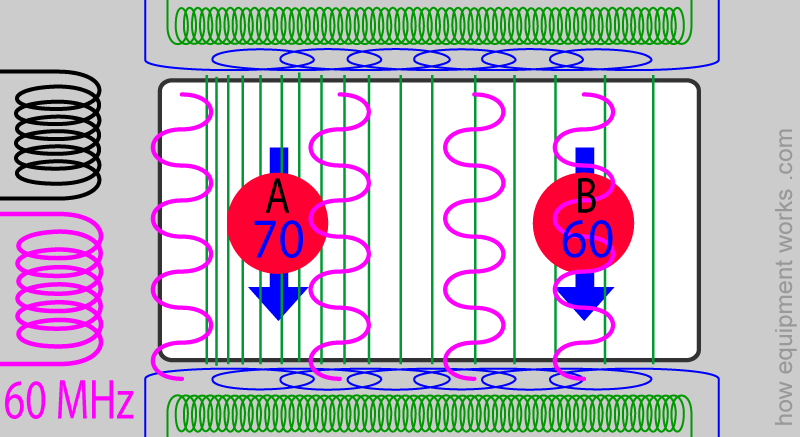
Because the RF energy of frequency 60 MHz is below the resonant frequency of the hydrogen nucleus at the head end of the patient (A), it simply passes this nucleus without getting absorbed. On the other hand, the 60 MHz RF energy exactly matches the resonant frequency of the hydrogen nucleus at the foot of the patient (B). This nucleus therefore absorbs the energy and changes its spin direction to be become an high energy nucleus.
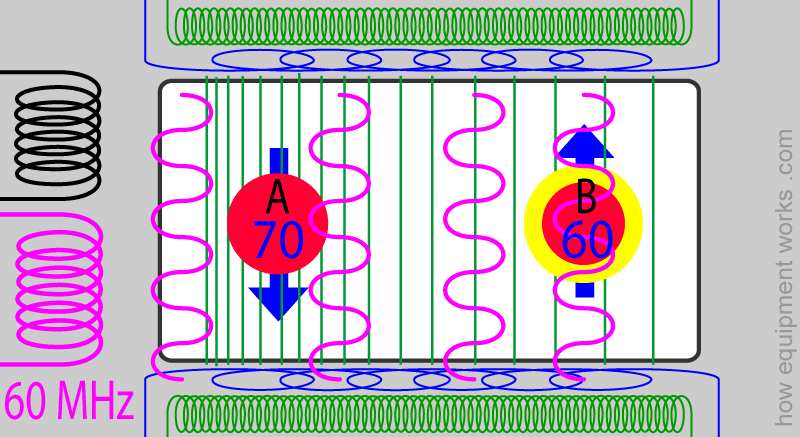
Once the RF coil stops transmitting energy, the listening coil (green) listens for a return signal of energy. Since it was only the hydrogen nuclei at the foot end (B) that absorbed energy, it is only these nuclei that now release energy. The other nuclei, e.g. ‘A’, do not respond, since they did not absorb energy. In this way, the MRI machine is able to get information specifically from the lower limb area of the patient.
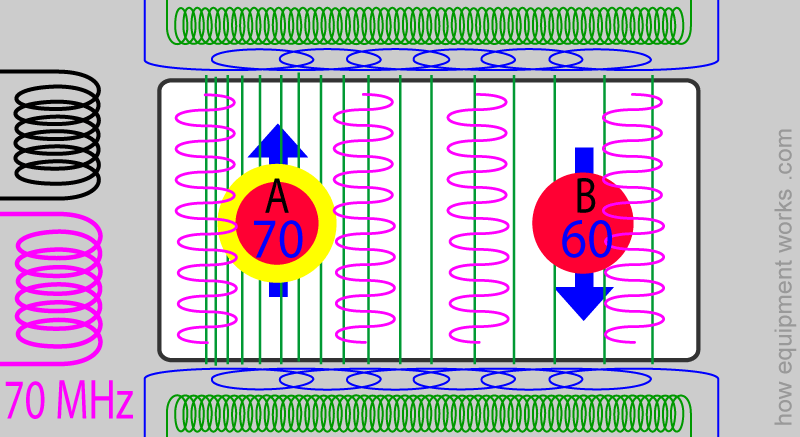
Now let us imagine that the MRI machine wants to image part of the head of the patient i.e. the area where nucleus ‘A’ resides. To do this, the MRI machine changes the emitted RF energy frequency to now match the resonance frequency of nucleus A. Therefore, this time, hydrogen nucleus A absorbs the energy as it matches its resonance frequency, whereas nucleus B at the foot end ignores this energy as it does not match its resonance frequency.
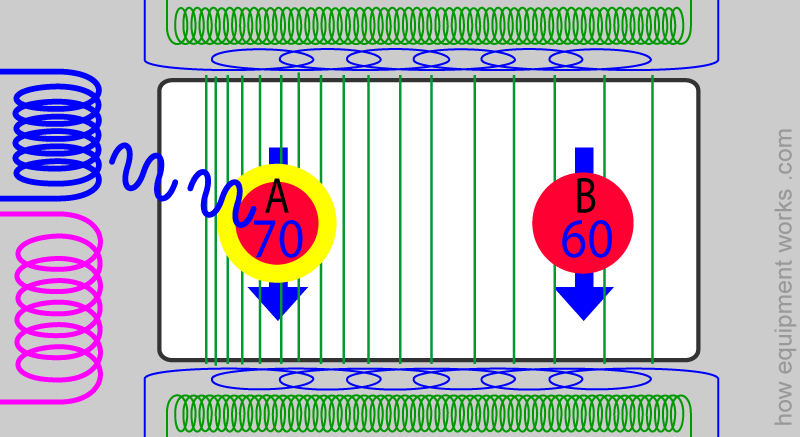
Once the RF coil stops sending energy, this time only nucleus A sends energy back.
So, by changing the frequency emitted by the RF coil ( e.g. 70, 68, 66, and so on ), the MRI machine can look for hydrogen nuclei section by section in an orderly manner.
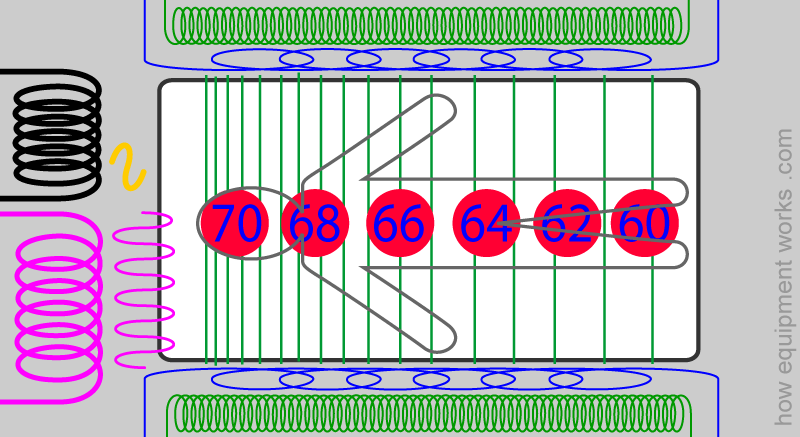
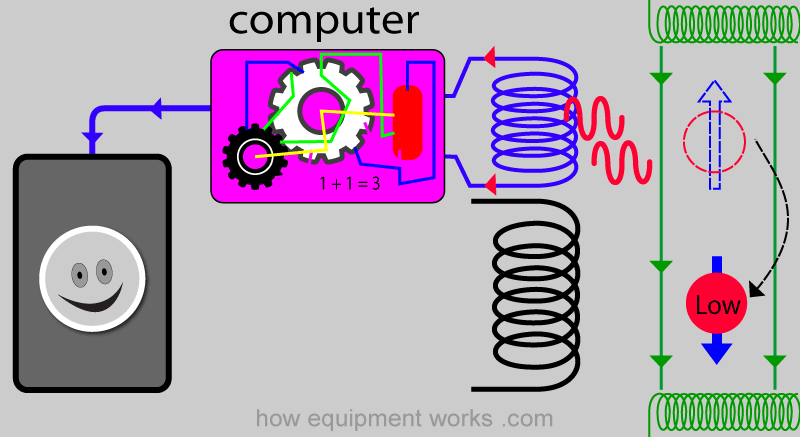
The MRI machine has a very powerful computer that controls various aspects of the scanning process. The computer controls the gradient coil to create an appropriate magnetic gradient. It then controls the frequency of the emitted RF energy according to which part of the body it wants to look at. It then collects the return signals that arrive at the ‘listening coil’. It repeats this process till the required anatomy of the body has been scanned.
The type of returning signal from hydrogen nuclei in different tissues is different. For an example, the returning signal from the hydrogen nuclei in the grey matter in the brain is different from the returning signal from the hydrogen nuclei in the white matter.
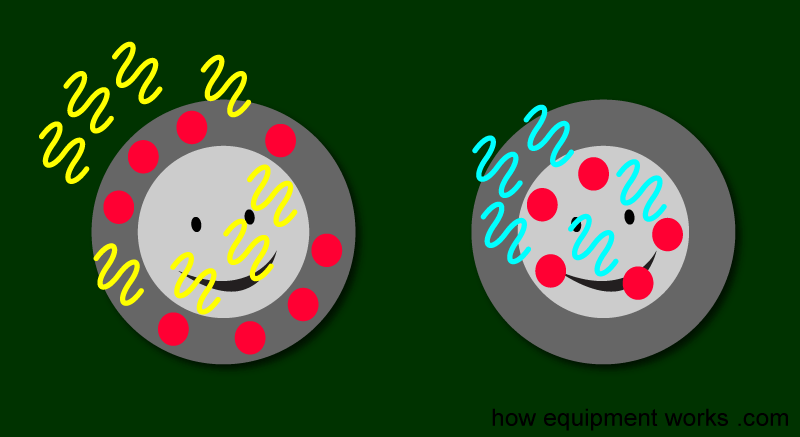
The computer processes all the information gathered to construct the high quality images. Of course, what I have explained to you is a super simplified version of how actually things happen. The real MRI machine works in a much more sophisticated way, and going into such detail is beyond the scope of this website and my mind.

Hello! My name is Pras and I am the author of this website that you are now reading. I have made this website completely free to access so that people from all over the world can benefit from it.
If you can afford it, I would be very grateful if you would consider making a single donation of one dollar (or the equivalent in your currency) to help cover the expenses needed to run this website (e.g. for special software and computers). For this website to survive, donations are desperately needed. Sadly, without donations, this website may have to be closed down.
Unfortunately, perhaps because many people think that someone else will donate, this website gets only very few donations. If you are able to, please consider making a single donation equivalent to one dollar. With support from people like you, I am sure that this educational website will continue to survive and grow.


Do you work in the field of anaesthesia? If so, are you a “wise” person?! Find out at the free anaesthesia website at the link below. In it, there is a lot of serious and non-serious stuff for those working in anaesthetics. You will also understand what the new anaesthesia concept called “BE WISE” is all about.

Receiver coils
You have seen that the receiver coil receives the energy released by the hydrogen nuclei that are moving from the high energy state to a low energy state. There are various types of receiver coils. It is often best to use a receiver coil that can be kept as near as possible to the area being imaged. For an example, for imaging structures in the head, one can use a “head coil”.
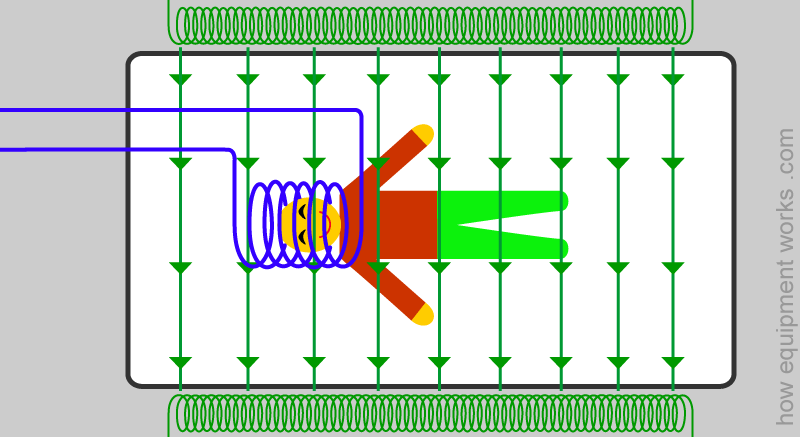
In certain situations, it is not necessary to use a separate receiver coil (blue coil below). Instead, the same RF coil (black coil in diagram) used to give RF energy waves to the nuclei can also be used to receive energy waves sent back by the nuclei.
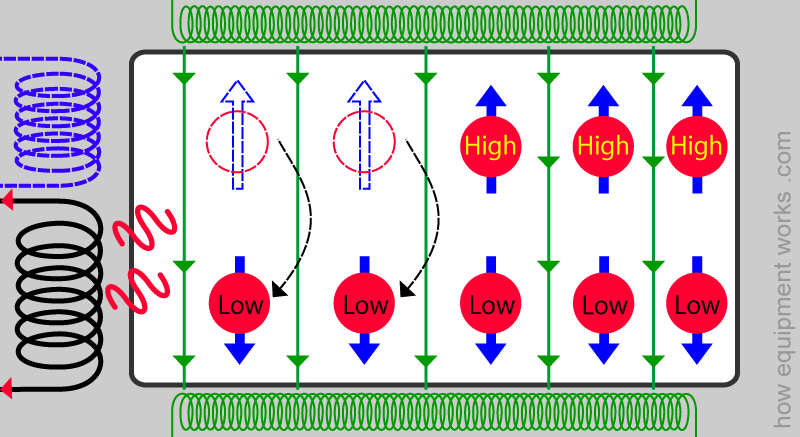
The MRI operator will choose the most appropriate receiver coil needed to give good signals from the area of the body being imaged.
Magnet and Quenching
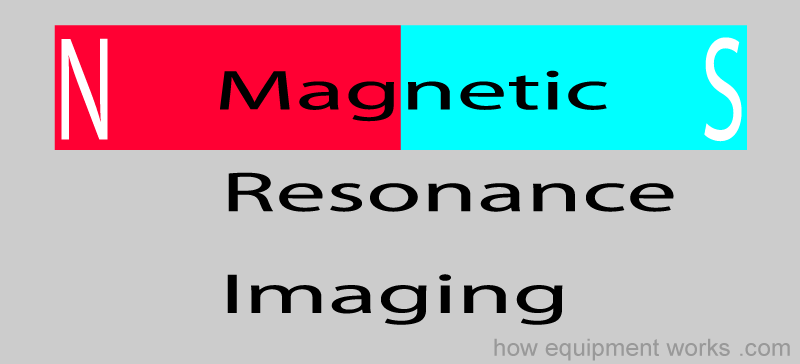
You will recall that the MRI machine needs a magnetic field to align the hydrogen nuclei.
That is why, “Magnetic Resonance Imaging” has the word “magnet” in it !
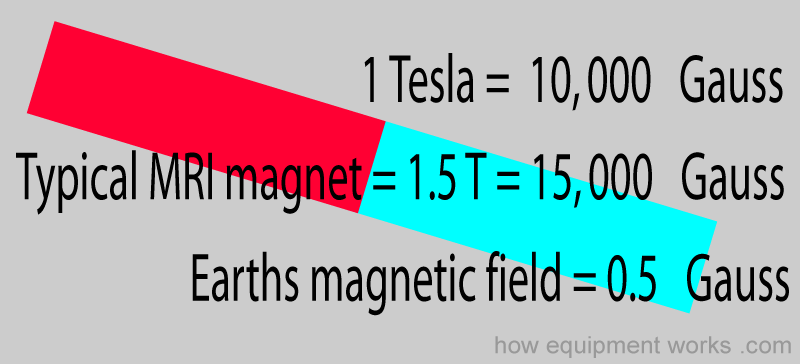
For the hydrogen nuclei to get aligned, the magnetic field needs to be extremely strong. The units of magnetism commonly used are Tesla and Gauss. A typical MRI magnet has a strength of 1.5 Tesla. This is about thirty thousand times stronger than Earth’s magnetic field.
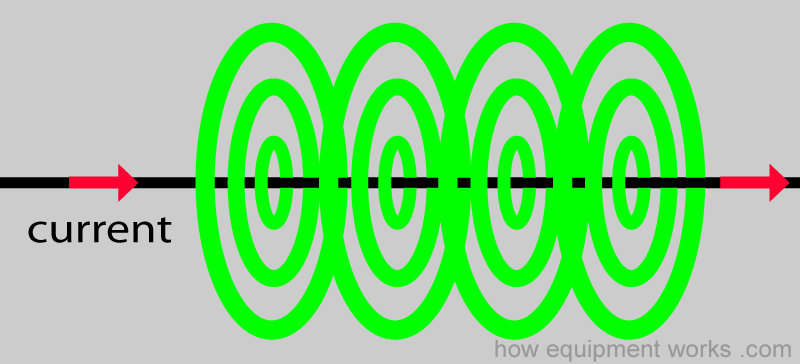
Such a powerful magnet needs a very special design. Typical magnets used in MRI machines are electromagnets. These make use of the basic electric property that when an electric wire carries an electric current, it generates an magnetic field around it.
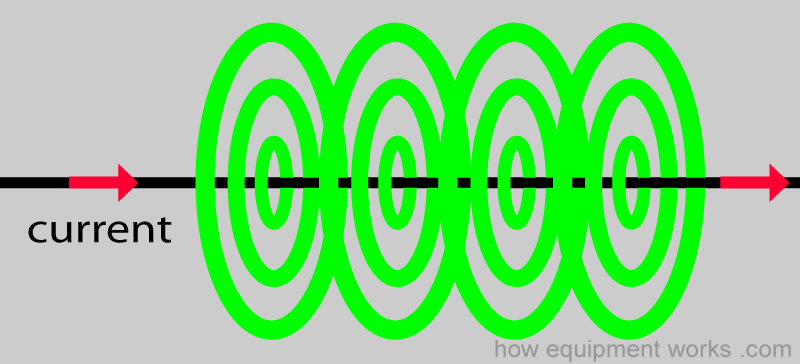
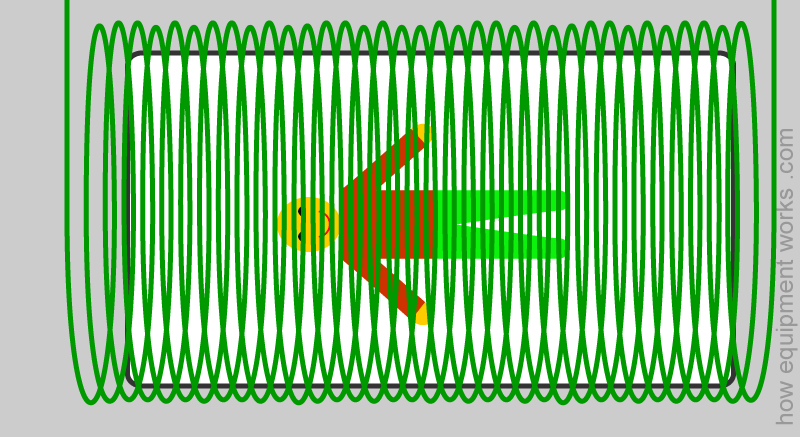
To save space and to generate a strong enough field, the wire is usually wound into a coil. In my previous explanations, I had drawn the magnet as two green coils on either side of the patient. This I did to make the images less cluttered.
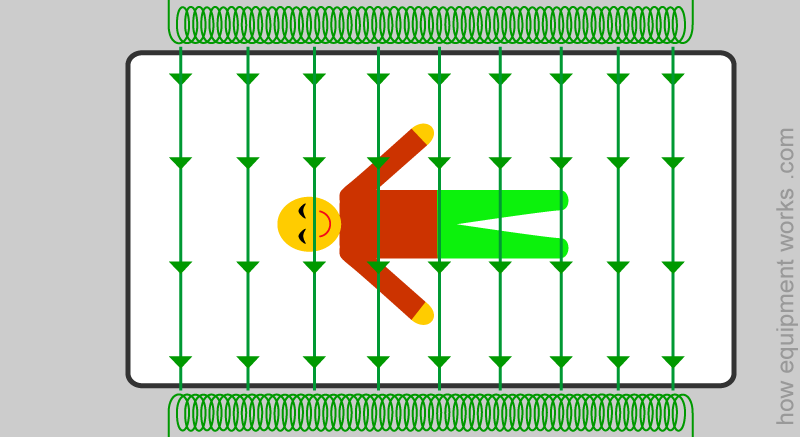
In reality, it is more like a coil of wire encircling the patient.
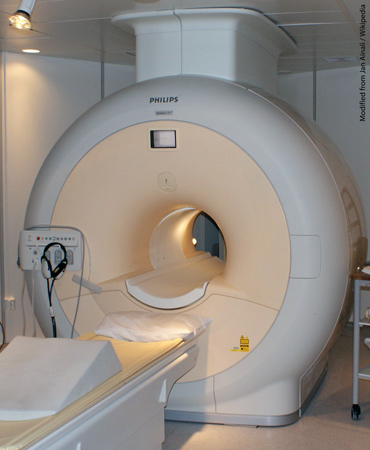
Below is an image of a real MRI magnet, which looks much less frightening than the one I have drawn above. The patient goes into the hole in the middle. The magnet coil goes around this hole.
I will now discuss a big problem faced by MRI magnet designers.
As you know, the MRI magnetic field has to be very strong. To create such a strong magnetic field, very large currents have to go through the wires of the magnet
You may recall from the section elsewhere on this website that deals with basic electricity, that wires have “resistance”. If you send an large current through a “normal” thickness wire, the wire’s resistance will try and resist the flow of this large current. This would heat up the wire and cause it to burn.
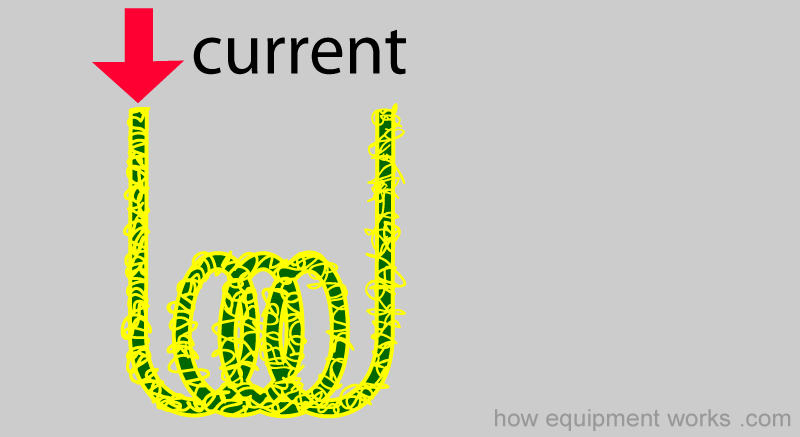
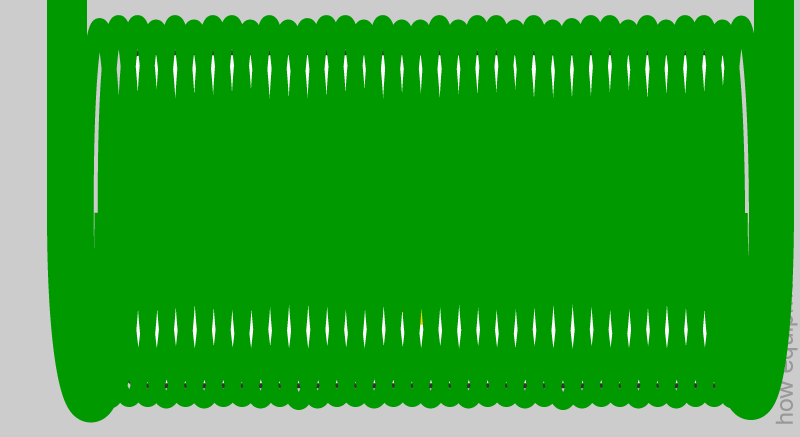
One option could be to use thicker wires since thick wires offer less resistance to current. However, to cope with the current needed to create strong magnetic fields that are needed for MRI machines, the wires would have to be very thick. The required thickness would be too much to make it usable in practice.
The designers of MRI systems came up with an ingenious solution. There is special property that happens to wires when they are made very cold. At very cold temperatures, wires lose all resistance to electric current. The physics reasons for this are complex, so let us not go into those details. A wire that has been made cold enough to lose all its resistance is called a “super conductor” . A super conducting wire of even a ‘normal thickness’ can easily carry massive amounts of current since there is no longer any resistance to current flow.
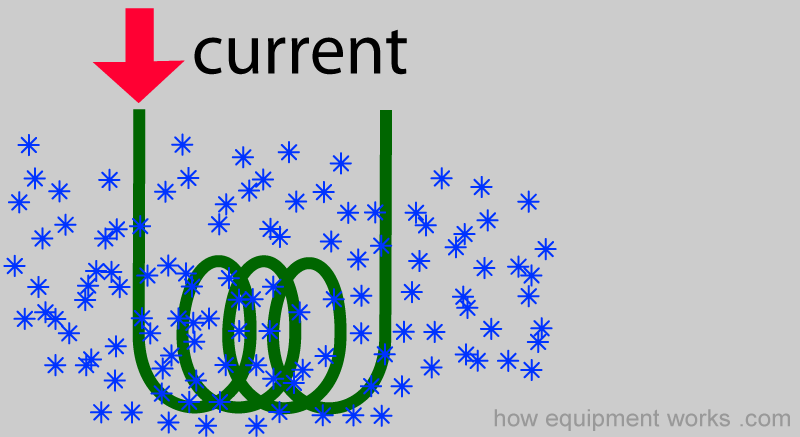
So, in typical MRI machines, the electromagnet coils are made super conducting by keeping the coils immersed in a very cold liquid.
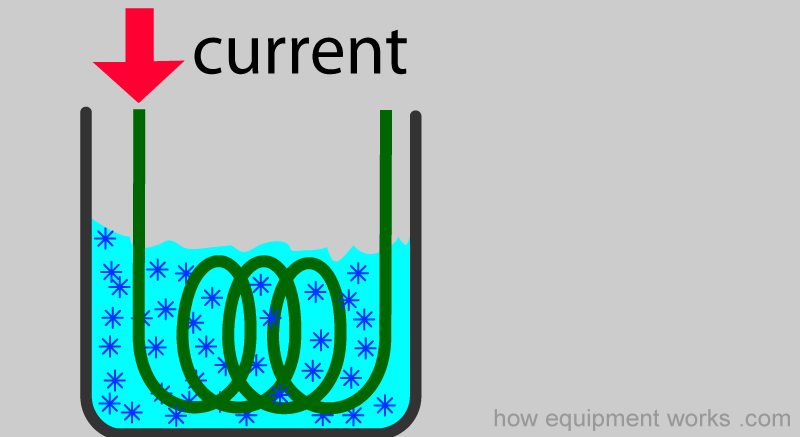
The substance chosen to keep the magnet coils cold is liquid Helium. Helium at room temperature is a gas, but at very cold temperatures, it is a liquid. As you can see below, the temperature of liquid Helium is very low !
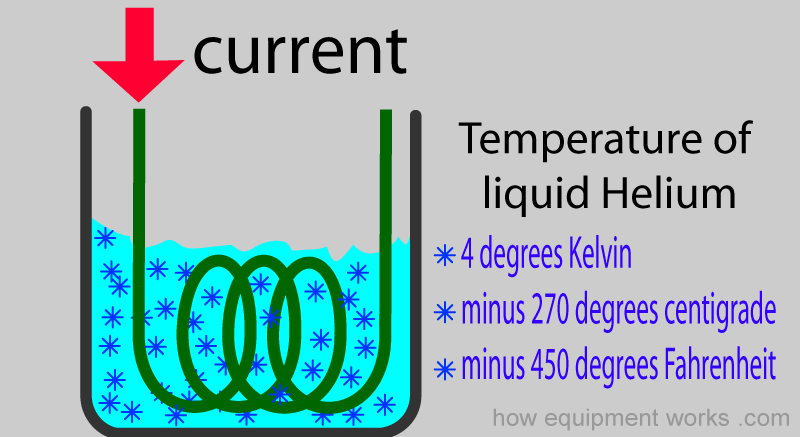
So to summarise, the MRI magnet needs to be very strong for the MRI to work. Normally to send such a strong current, the wires would have to be extremely thick and this is not practical. So the wires are immersed in liquid Helium and this makes them extremely cold. The extreme cold condition makes the wires lose all resistance and become “super conducting”. This enables the MRI machine to have large currents generating strong magnetic fields while keeping the wires relatively thin. i.e. Have a strong but compact magnet.
Going around forever !
In addition to enabling the use of thinner wires, super conductivity has another very interesting benefit. Normally, an electromagnet needs a constant current applied to it to generate a magnetic field.
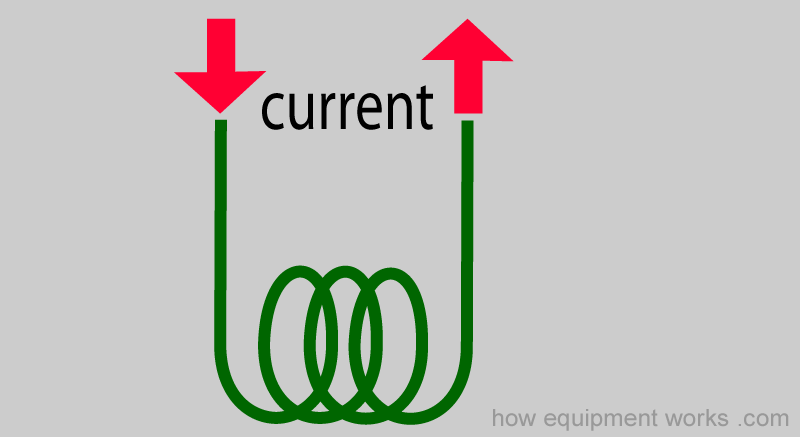
However, with super conductivity, since there is no resistance, any electric current given to the coil will simply keep flowing ‘forever’. This property can be made use of for the magnet not to need a continuous current supply. When the magnet is first installed, the engineers give it an electric current.
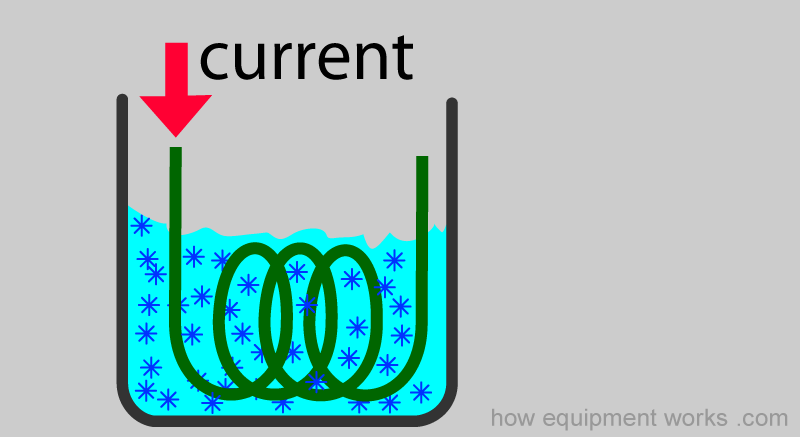
Once the initial current is given, because the wire is super conducting and has no resistance, it simply continues to flow round and round “forever”. No further current supply is required ! This free flow of electrical current means that the coil keeps producing a magnetic field forever.
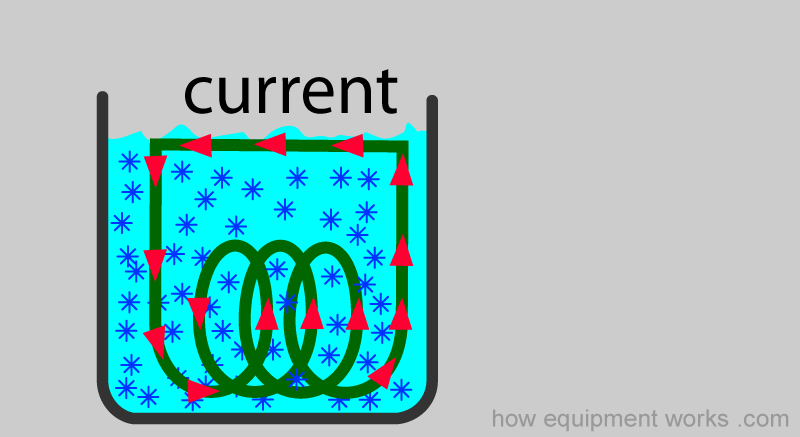
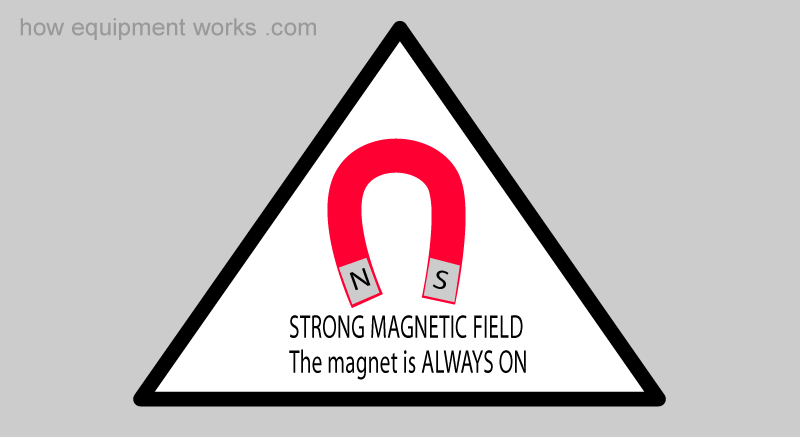
It very important to keep in mind that, because of the above phenomenon, that the magnet is always ON. Even when the MRI machine appears to be “OFF” and the staff gone home for the night, the magnet keeps on working.
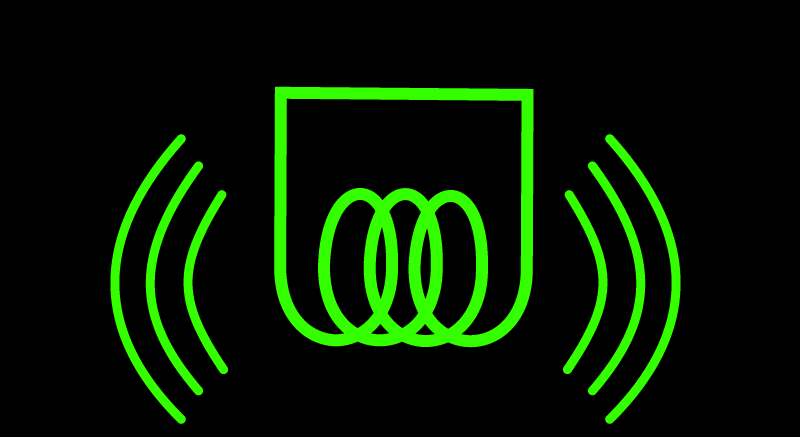
So you need to be cautious of the magnet at all times, even when the machine appears “quiet and inactive “ and doesn’t have a patient in it.
Quenching
Before I proceed, let me tell you that this an extremely rare occurrence. So please do not worry excessively about it happening to you either as a member of the staff or even as a patient.

Quenching is the shutting down of a super conducting magnet. Rarely, it can happen spontaneously due to a fault in the magnet. For an example, a fault in the magnet can cause a small length of wire to heat up (pink area in diagram).
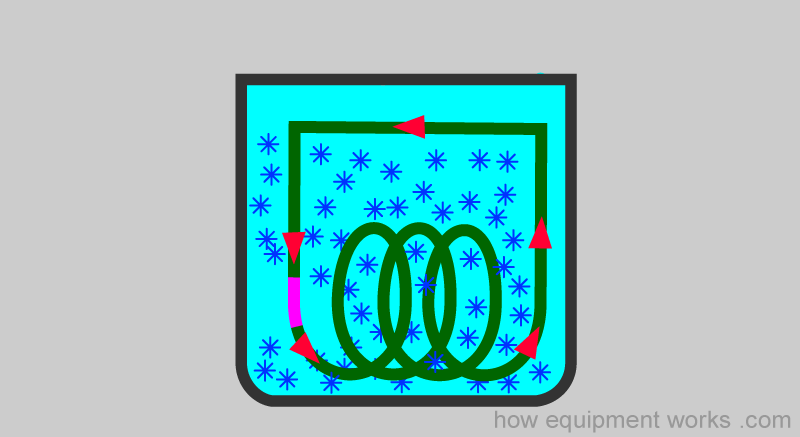
The heating of the wire due to the fault, makes that part of the wire ‘non super conducting’ and develop a resistance to current flow (pink area). The current from the other still super conducting portions of the wire (green) try to cross this localized area of high resistance and this leads to additional heat generation (yellow).
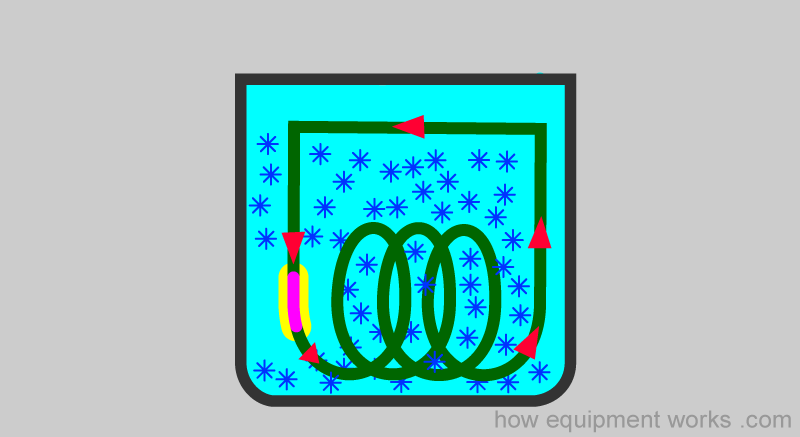
The additional heat spreads and causes adjacent parts of the wire to also warm up and become non super conducting. This leads to further areas of the wire losing its super conductivity status and develop high resistance to current flow. Current trying to flow through this increased resistance creates even more heat and the process continues.
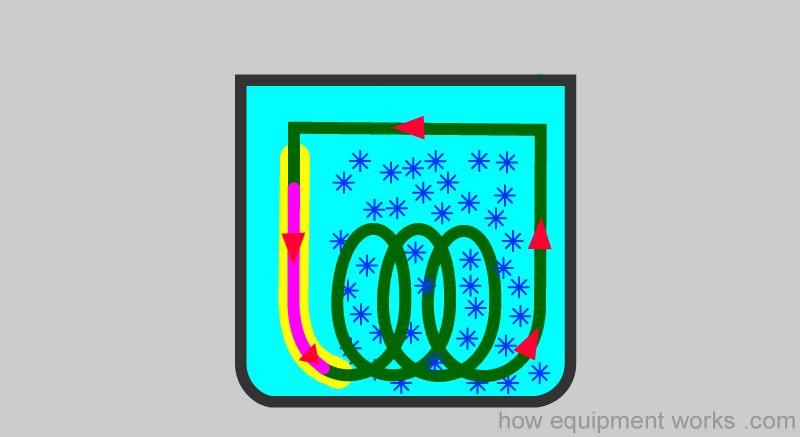
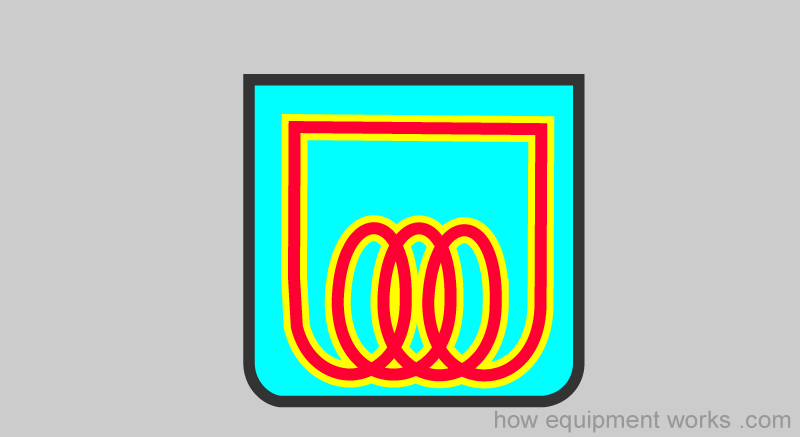
Soon the whole wire coil heats up.
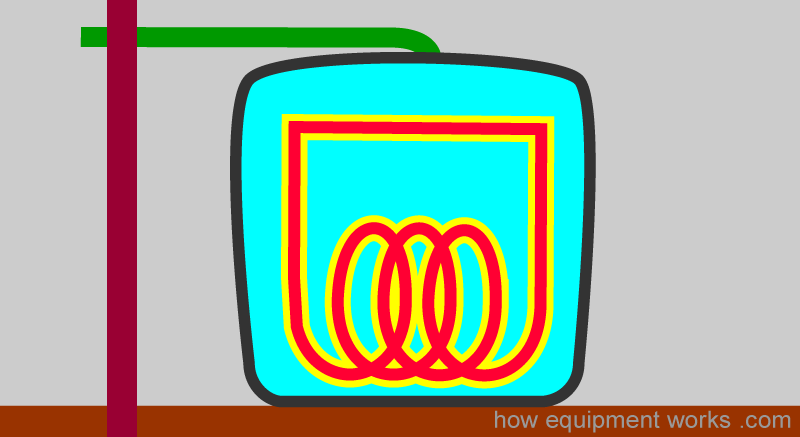
The heat starts to “boil” the Helium. There is a build up of high pressure as the liquid Helium wants to expand and get out. This is a dangerous situation as the Helium tank could now explode. Fortunately the MRI machine designers have thought of this situation and have placed a pipe (green) connecting the tank of Helium to the outside of the hospital.
A safety valve opens and releases the Helium safely out of the hospital.
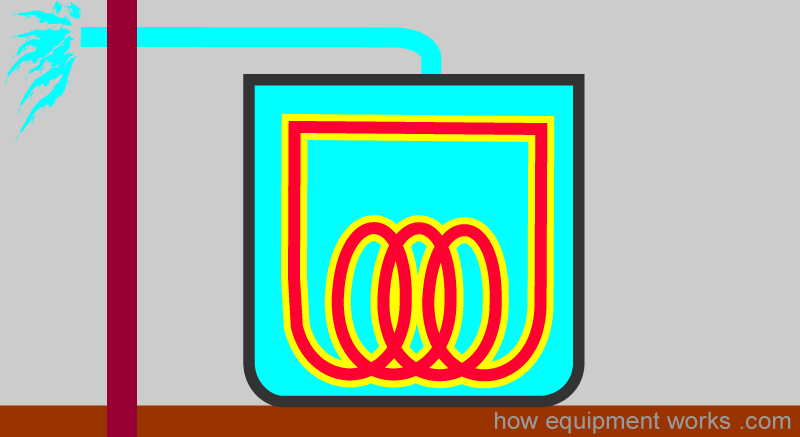
Once all the Helium has been vented out, the magnet is safe.
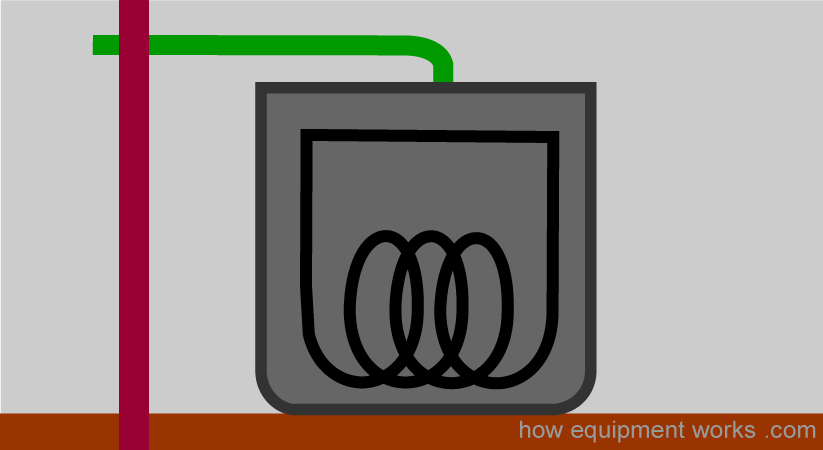
Magnet quenching not always due to a magnet fault. In very specific circumstances, it may be necessary for the MRI operator to shut the magnet down. Let me explain how this “staff initiated quenching “ happens. Somewhere near your MRI machine will be a STOP button used to stop (quench) the magnetic field. ( As you look at the button you will notice that the MRI staff will be staring at you with fear, worrying that you might press it by mistake).

The “ magnet stop “ button is a button that you certainly don’t want to press by mistake. The button is connected to the venting system.
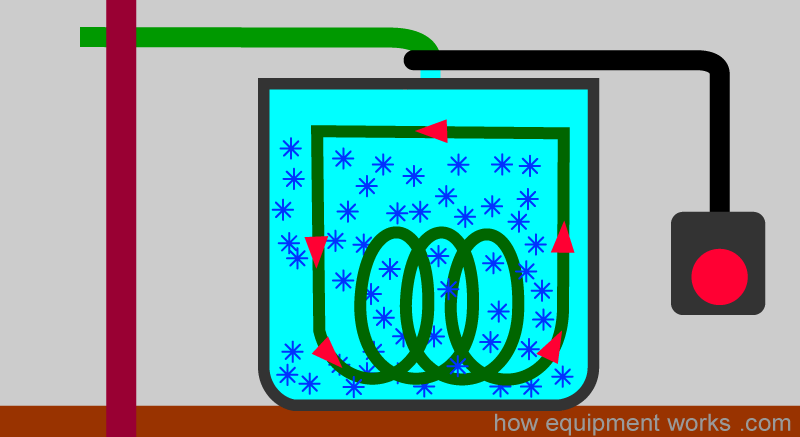
If the button is pressed, a valve opens the venting tube. The Helium is then safely released to the outside of the hospital.
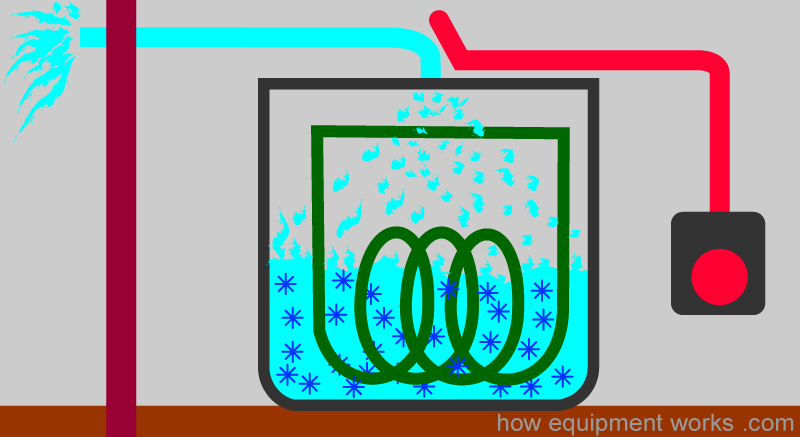
The loss of Helium warms the magnet and stops the superconductivity. The wires now develop a resistance to the current flow which then stops.
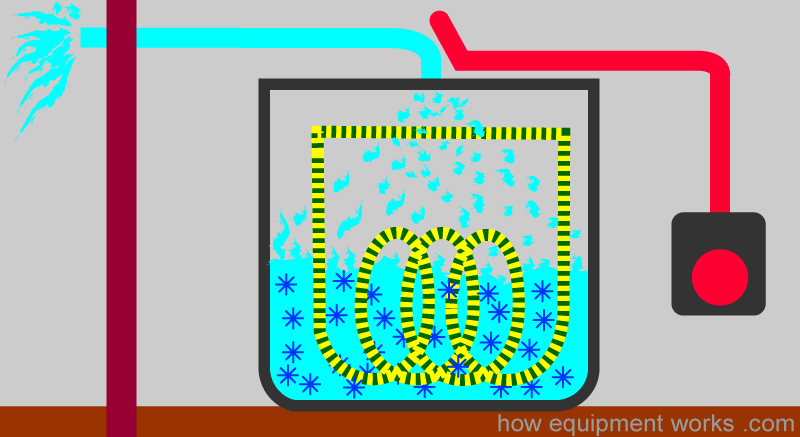
Without current flow, there will no longer be magnetism. The magnet now has been successfully quenched.
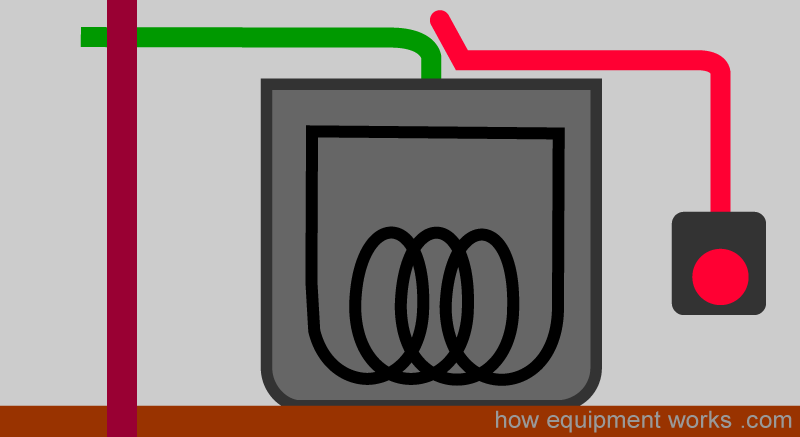
You should not use the emergency quench button for every type of emergency. Quenching results in the loss of Helium which is extremely expensive to replace. Furthermore, the process of quenching can damage the magnet which can take a long time to repair, making the MRI unavailable for other patients.
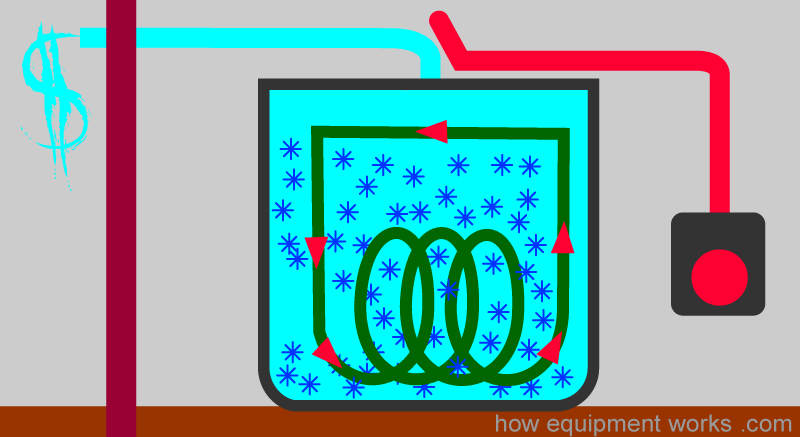
Most emergencies in the MRI room will not need you to press the quench button. You can manage emergencies in the MRI machine room itself provided you have the appropriate MRI safe equipment. Other emergencies you can manage by taking the patient to a room located next to the MRI machine, where you can safely use standard hospital equipment. However, in certain rare situations you may have to stop the magnetism by quenching the magnet. For an example, just imagine that someone, by mistake, brought in an steel oxygen cylinder near the MRI machine.
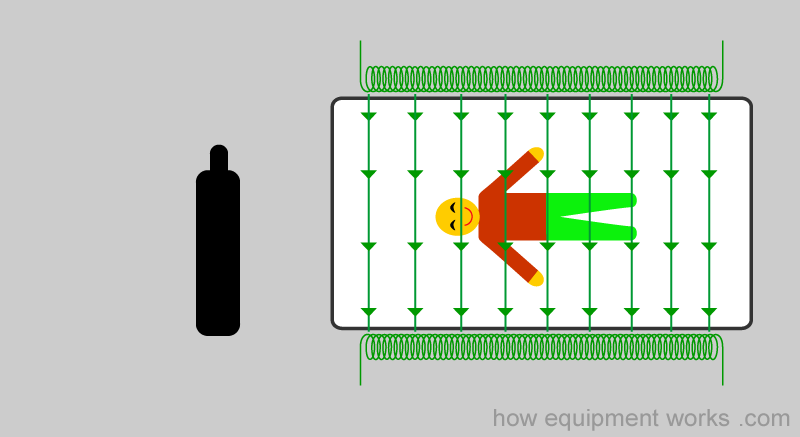
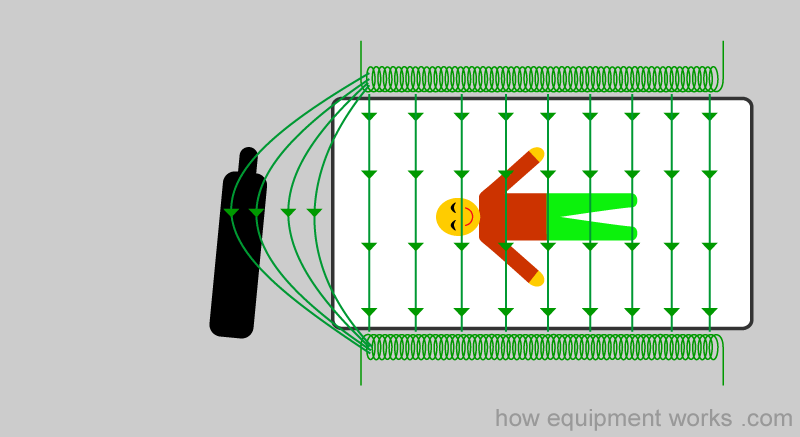
It is important to recognise that the magnetic field of the MRI machine extends beyond the patient scanning table.
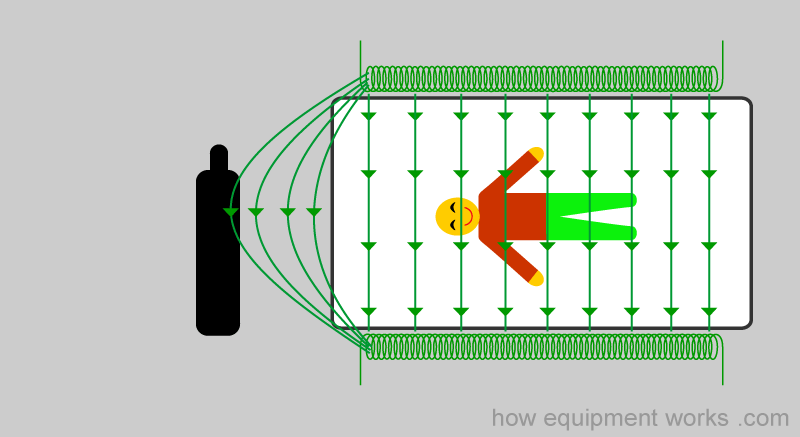
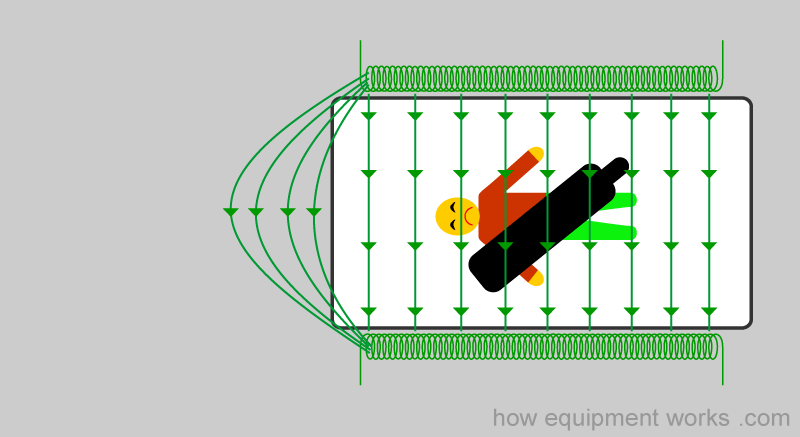
Imagine that the cylinder now gets pulled into the magnet and traps the patient underneath it.
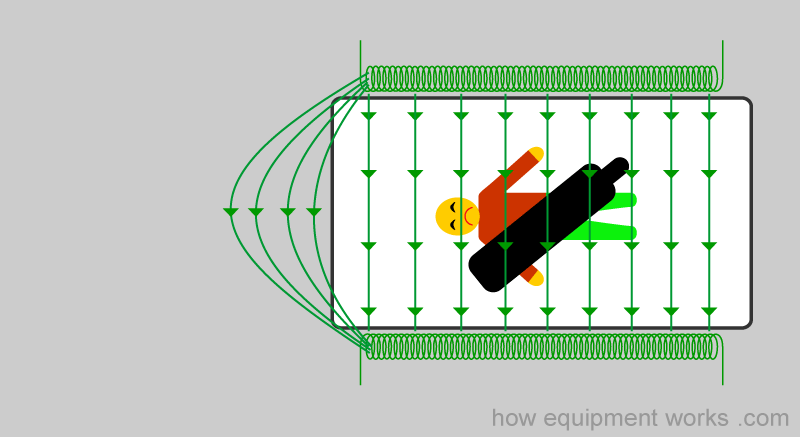
If you can’t physically remove the cylinder using a normal force, your only option might be is to put the magnet off by quenching it. Now that the magnetic field is gone, you can easily remove the steel cylinder.
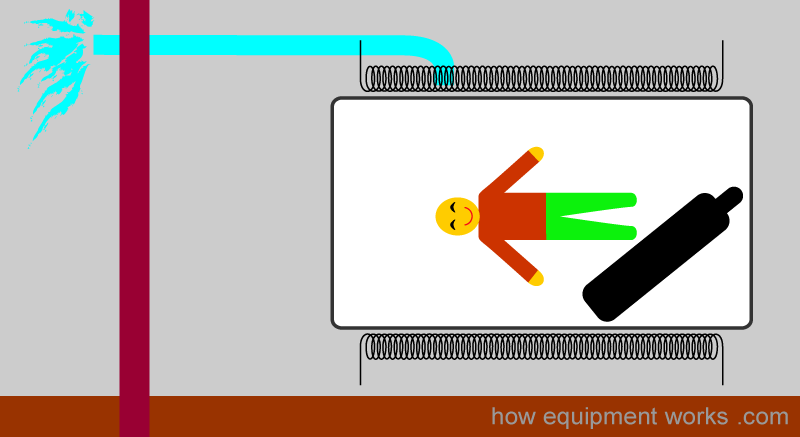
Potential issues during magnet quenching:
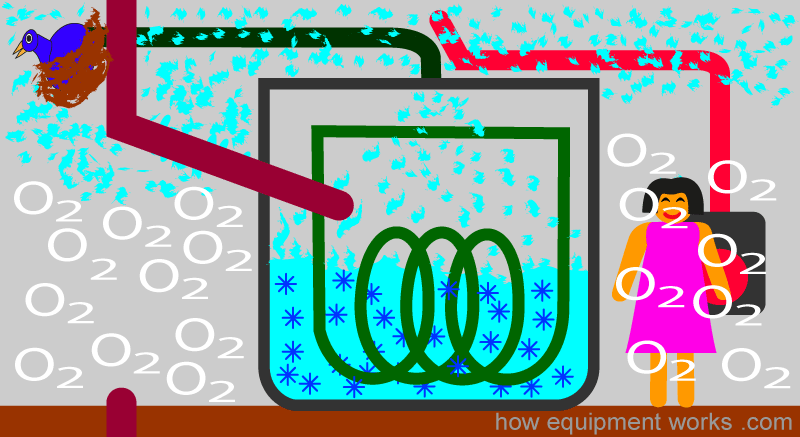
During a quench, certain conditions such as blockage of the venting pipe can result in Helium getting released into the room containing the MRI machine rather than being released to the outside of the building. The liquid Helium that enters the room will rapidly become a gas at room temperature and will rapidly expand to fill the room.
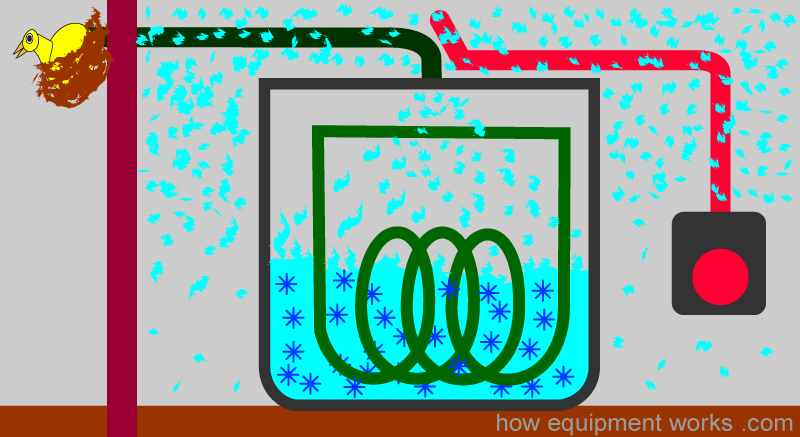
There are some risks to patient and staff associated with Helium release into the MRI room. One consequence can be quite funny. The Helium will raise the “pitch “ of peoples voices making them sound like characters in children’s cartoons. This happens because Helium has a low density and this makes sound travel faster. If you want to hear a sample of a helium voice, I suggest that you visit YouTube.com and type in the search term “funny helium voice “. While you are at Youtube.com, you can also type in the search term “mri quench” to see some videos of real MRI magnets quenching.
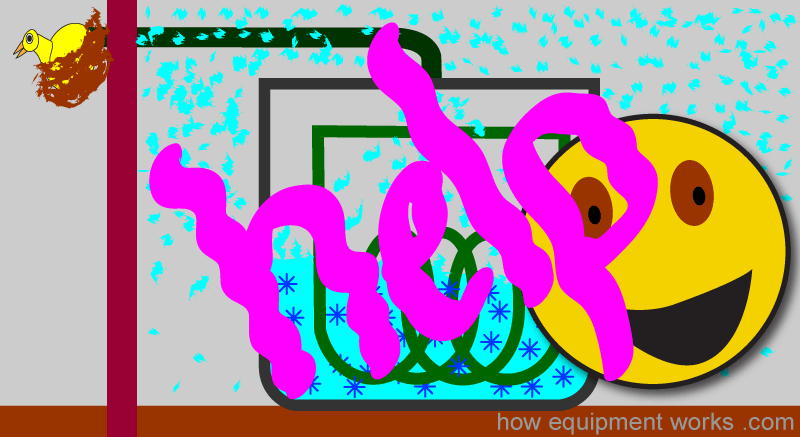
A much more serious consequence is that the Helium can push the oxygen to the bottom of the room resulting in hypoxia to the patient and anyone else in the room.
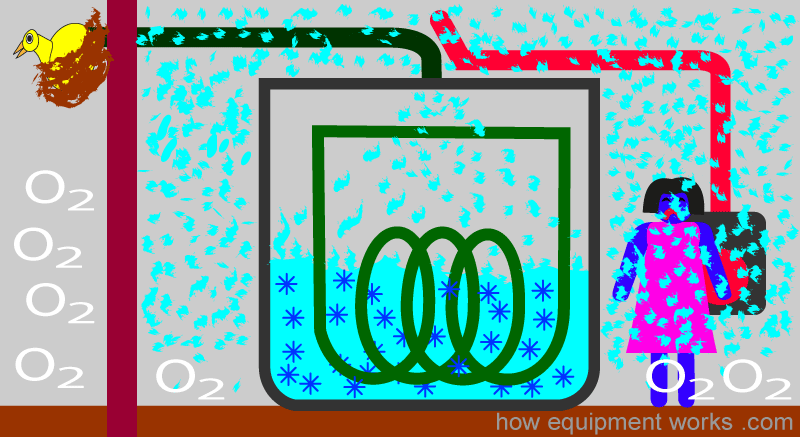
Therefore, during quench, it is important to open the door of the MRI room to let the Helium out. One must also calmly but quickly evacuate the patient and staff. I have only given a very brief introduction to quenching. You must prepare for this rare eventuality using information from your hospital policies.
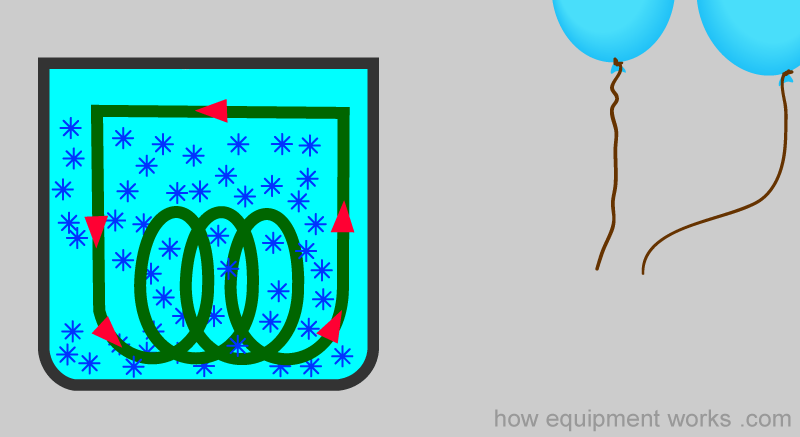
A small note to end this section: While reading around to write about the MRI machine, I was shocked to read news articles that say that the worlds Helium supply is diminishing. This news is making me wonder about the Helium that is used to inflate party balloons that float. As you may know, balloons filled with Helium float in the air because Helium has a low density.They are beautiful to watch.
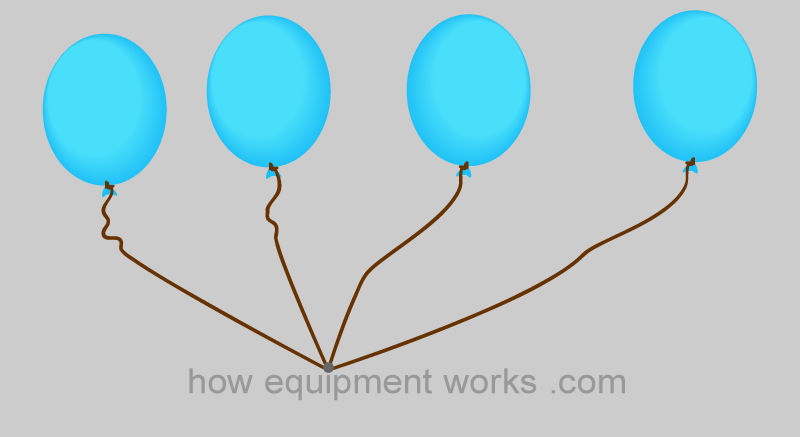
But I wonder if we should be wasting such a useful resource on floating party balloons ? Instead, shouldn’t we safeguard the worlds Helium reserves for MRI machines instead ?
Why MRI machines are so noisy : The “Gradient Coil Guitar”
If you have been next to or inside an MRI machine (as a patient !), you would know that it can be noisy. However, if you have only been inside the MRI control room, you may not appreciate how loud it is. Furthermore, the MRI machine produces a large variety of different sounds.
The reason why the MRI machine is so loud is that it is actually an “huge guitar”. Don’t worry, I will explain it to you.

As mentioned before, the MRI machine has an extremely strong magnet, shown as the green coil below. This magnet produces a field that is equally strong everywhere.
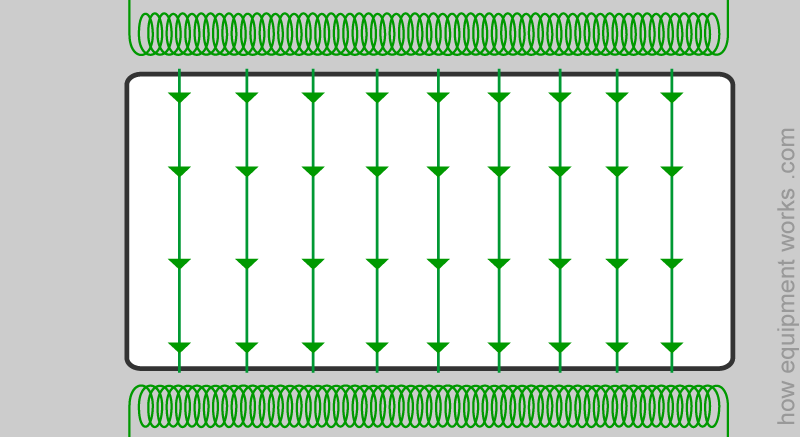
You also know that there are ‘gradient coils’ ( blue coils below) that modify the main magnets uniform field to produce magnetic gradients.
The gradient coils create a gradient by producing a small magnetic field within the main magnetic field. The two magnetic fields interact and result in the magnetic gradient.
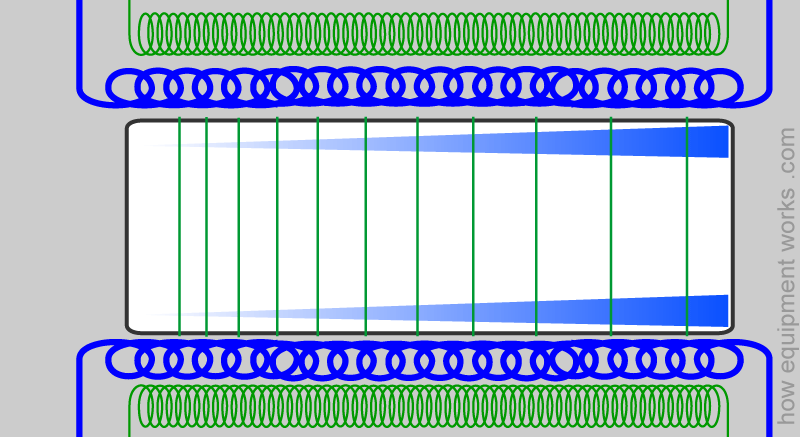
The gradients that I have shown in our discussions have been simplified greatly. In reality there are many gradient coils and as the MRI machine scans different parts of the body, the coils work together to create very complex gradient fields.
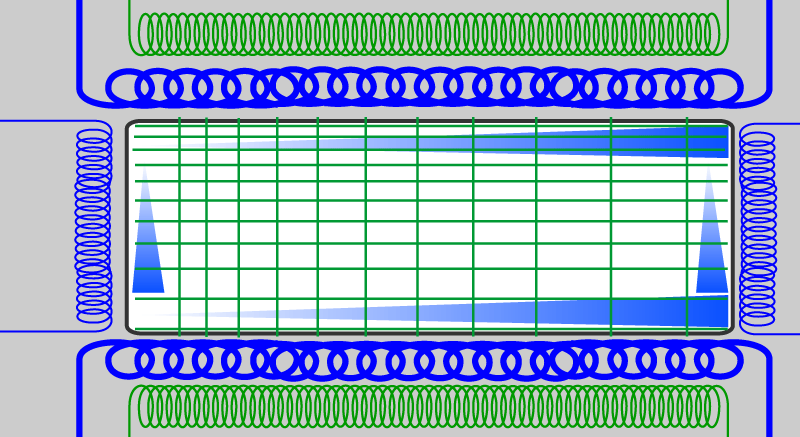
As the MRI machine scans different areas of the body, it changes the gradients as necessary. The changes of the gradients are made by rapidly changing the magnetic fields produced in the gradient coils. The gradient coils have a tough job to do. It is quite “difficult” for them to create their modifying magnetic fields in the presence of the extremely strong main magnetic field. When the gradient coils produce magnetic fields to alter the main magnetic field, due to the huge magnetic forces involved, they move slightly.
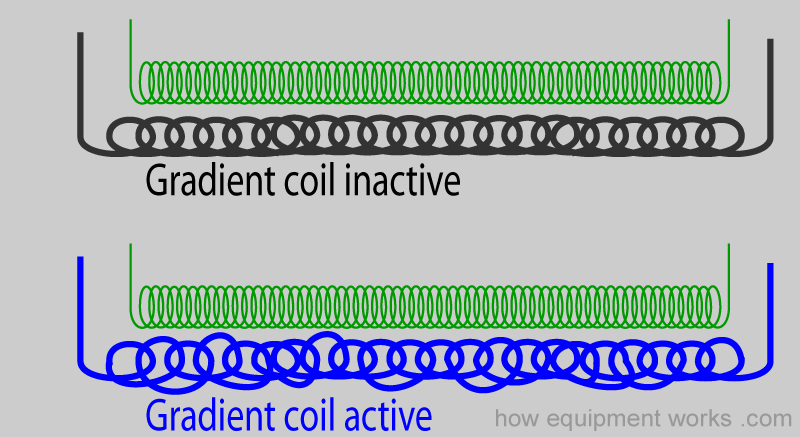
The MRI machine changes the gradients very rapidly in complex ways. This causes the gradient coils to rapidly move slightly(vibrate). The vibrating gradient coils now produce sound (red lines).
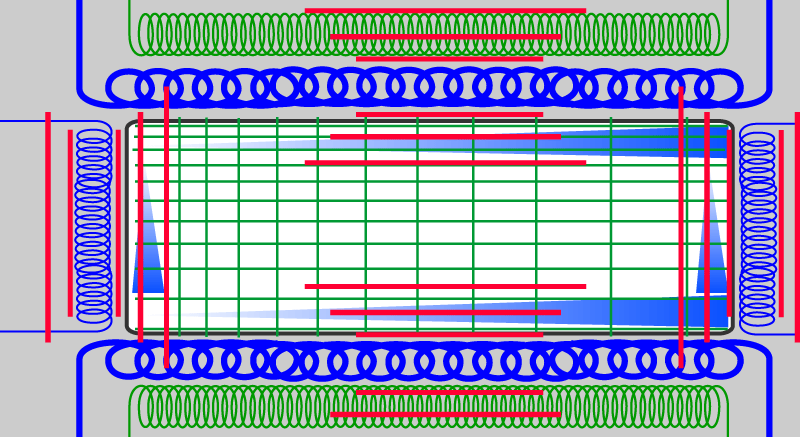
I see the MRI machine as a gigantic guitar, the gradient coils being the guitar strings. As the MRI creates complex gradients, the guitar strings (gradient coils) vibrate, producing the most amazing variety of tunes. If you have access to Youtube.com , please visit it and type “MRI sounds” to hear the amazing sounds I am referring to. Make sure you click on more than one video, so that you can hear the wide variety of sounds produced.
Enjoy the “Gradient Guitar !”

Putting amusement aside, gradient coil noise is an huge problem with current MRI scanners. It is loud enough to require patients and staff to wear ear protection.
Anesthesia and MRI
This website is primarily written for personnel working in anesthetics. However, I am aware that there are many thousands of non anaesthesia visitors as well (who are of course most welcome). The next section is primarily for those in anesthetics, so some of you might wish to leave us here.
Providing anaesthesia services for MRI is very challenging. Only those who have the relevant expertise should be involved in the unique world of MRI. The focus of this website is mainly non clinical and the discussion that follows is therefore very basic and may not be accurate for your clinical setting. Therefore, please do not rely on the information here for actual patient care.

Anaesthesia and MRI are like a married couple who often get irritated by each other.
The MRI machine can get in the way of anaesthesia, and the reverse is also true, where provision of anaesthesia can mess up MRI scans. However, for the sake of producing good images and keeping the patient safe, the couple needs to work together, taking care not to upset each other.

Let us discuss some challenges.
Distance:
The MRI machine may be some located some distance away from the operation theatres. The location of the MRI room has to take into account many considerations. The MRI magnet can weigh 3000 – 4000 kilograms (6600 – 8800 pounds) and therefore needs to be on a sturdy floor. One also needs to choose an area that minimises electrical , magnetic , and vibration interference. All this means that the MRI may be installed in a room that is distant from your normal area of work (e.g. operating rooms). If there is an emergency, it may be difficult to get appropriate help and equipment in an hurry. Therefore, you and your team should have the necessary skills to cope with emergencies. You will also need to keep appropriate equipment.
Magnetic field:
As discussed above, the magnetic field in and around an MRI machine is very strong. Therefore staff and patients must avoid taking with them items likely to be attracted by the magnetic field. To comply with this, the MRI personnel will administer a checklist to make sure everyone is in the clear. Even with the check list, it is worth checking your pockets for items you may have forgotten about.
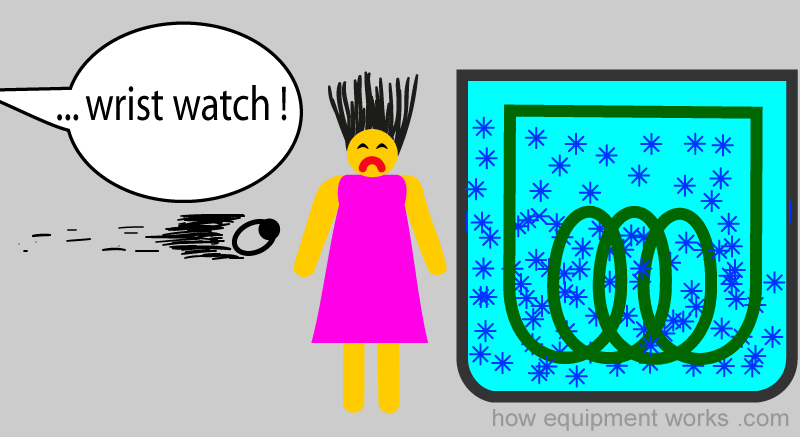
Small items can become lethal bullets as they get attracted by the magnetic field.

As you saw before, large objects can also be drawn into the MRI machine.
Such large objects may trap staff or the patient.
Radio frequency burns:
You will recall that the MRI machine sends pulses of RF energy to the patient.
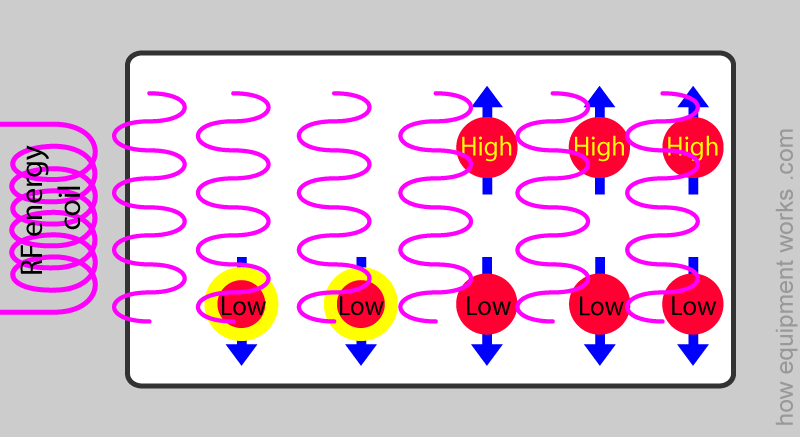
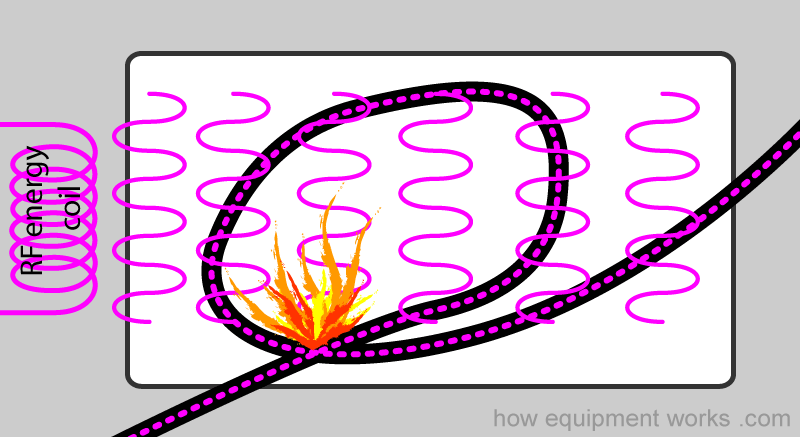
Unfortunately, this energy can also be picked up by wires and metallic objects. For an example, electrocardiogram wires can pick this energy and heat up, potentially causing burns to the patient.
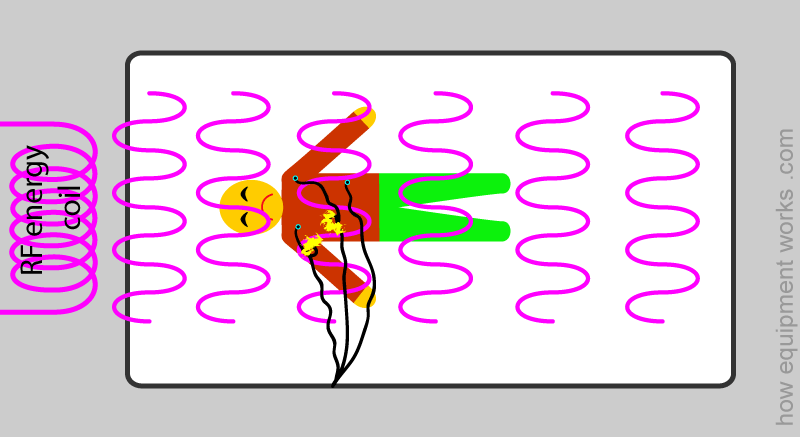
Special precautions must be taken to prevent RF energy related burns. For an example, to prevent burns, electrocardiogram leads should be specially designed, may need to be placed in a certain way on the chest, must not be allowed to form loops (which are very good at picking up RF energy) and should have an adequate insulation gap between the wire and the patient. As mentioned before, please get specific advice from experts regarding working in the MRI environment.
There are of course many other aspects such as remote monitoring, breathing systems, etc that I have not touched upon. I hope my discussions have given you a starting point of understanding the wonderful and mysterious world of the MRI machine. Thank you for sticking with me to the end (like a magnet !).
We have now reached the end of our discussion on the basic physics of magnetic resonance imaging. I hope it has given you a good introduction to the subject and will help you when you read further on this topic. Bye till we meet again in another section !

Hello! My name is Pras and I am the author of this website that you are now reading. I have made this website completely free to access so that people from all over the world can benefit from it.
If you can afford it, I would be very grateful if you would consider making a single donation of one dollar (or the equivalent in your currency) to help cover the expenses needed to run this website (e.g. for special software and computers). For this website to survive, donations are desperately needed. Sadly, without donations, this website may have to be closed down.
Unfortunately, perhaps because many people think that someone else will donate, this website gets only very few donations. If you are able to, please consider making a single donation equivalent to one dollar. With support from people like you, I am sure that this educational website will continue to survive and grow.

